Signing a contract has long been a painful process. You’re tired of all the hassle that comes with the traditional way of getting the job done: printing, scanning and emailing back to the sender.
Well, eSignature software makes it easy to sign and share your contracts online.
There are tons of reasons more and more businesses are adopting eSignatures.
The case for eSinging includes:
- Improved productivity- the biggest benefits are time saving and shorter approval processes for agreements, reports an AIIM survey.
- More than 70% of business leaders believe streamlined document management would improve the customer experience, according to the International Data Corporation.
Industries worldwide are reaping the benefits delivered by eSigning solutions. And the size of your business doesn’t matter - you can be a contractor or using it in your personal capacity - anyone can take advantage of these time and cost savings.
Are Contracts Signed Online Binding?
Ok, you’re convinced: electronic signatures are going to make your life easier. But will your new electronic contract be legally binding?
Now, there are different types of electronic signatures. When you take an image of your handwritten signature, upload it and paste into a document, you are signing that document electronically. But this method isn’t secure or legally binding. You’re leaving yourself open to a disputed agreement down the line.
A secure option is eSigning software like Xodo Sign.
When you sign a contract online with a tool like Xodo Sign, you know your contract is legally binding because it complies with global eSigning regulations.
Now, let’s take a look at how you can sign a contract online using Xodo Sign.
How to Sign a Contract Online with Xodo Sign
Xodo Sign makes it easy to sign contracts online, eliminating a lot of the cumbersome parts of the process.
We’ll walk through the steps to get your contract signed.
Upload Document to Xodo Sign
Before you can begin, you need an Xodo Sign account. You can select a free plan for three signed documents per month.
You can also find the paid Xodo Sign plan that best suits your needs.
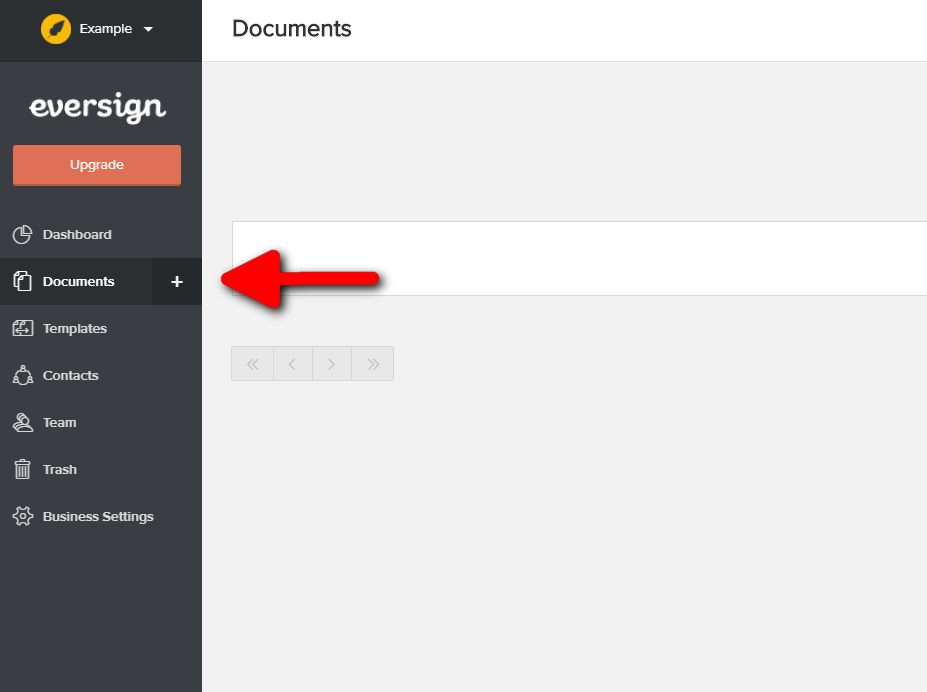
Once you’re inside your Xodo Sign dashboard, head over to the screen pane on the left, selecting Documents > +
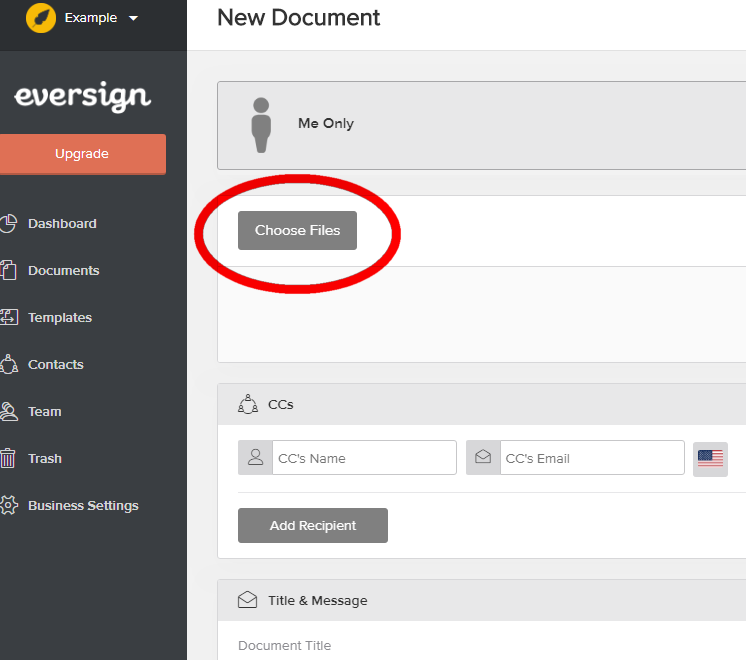
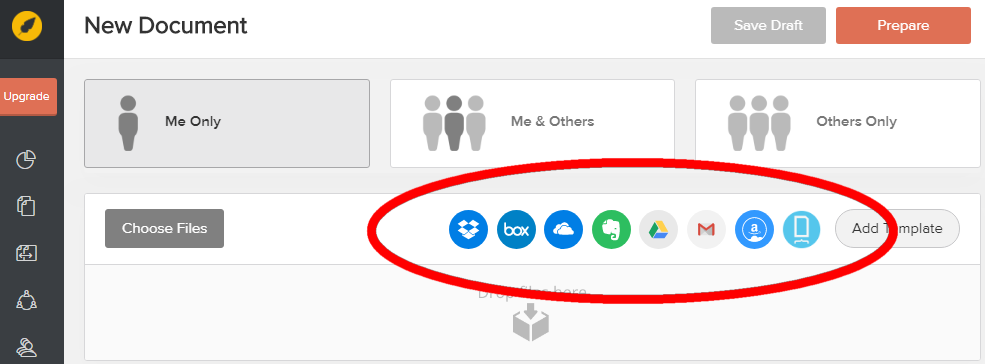
You have a few options. You can select Choose Files and browse files on your computer.
Or you can opt to import files directly from:
- Dropbox
- Box
- OneDrive
- Evernote
- Google Drive
- Gmail
- Cloud Drive
- Docracy
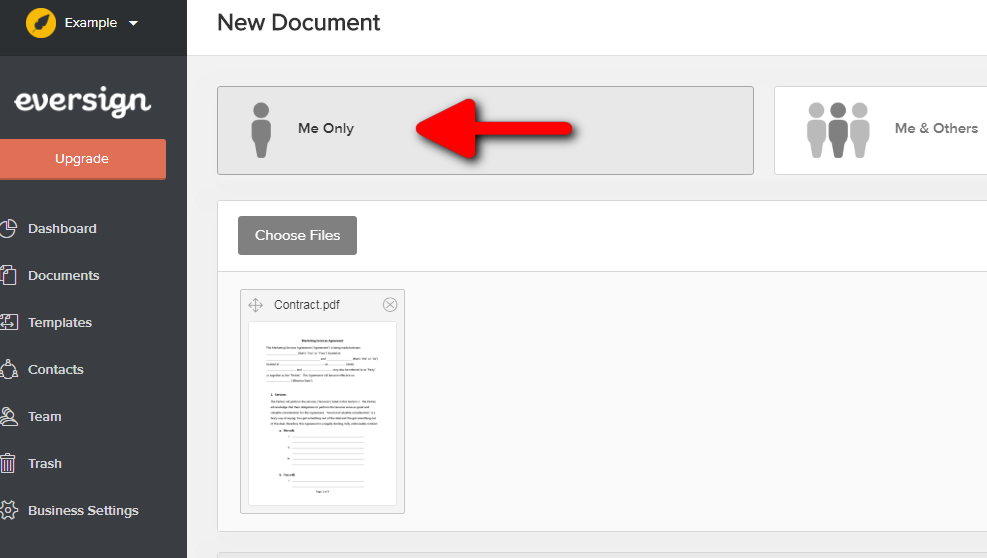
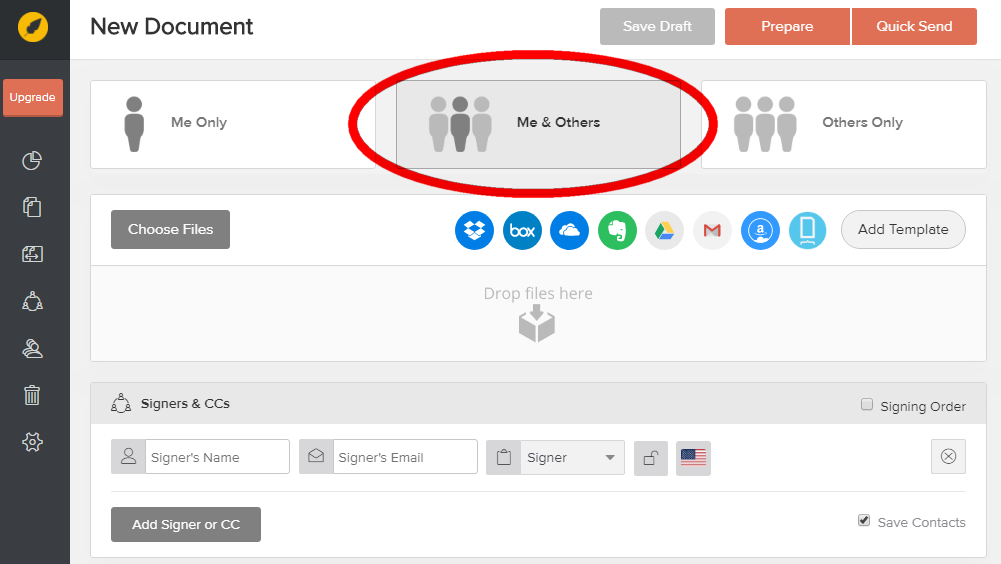
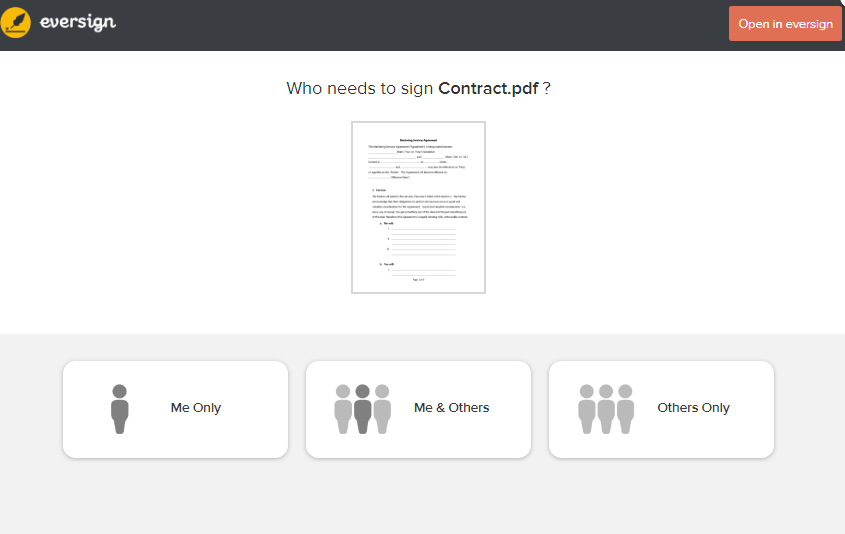
Once you’ve successfully imported your document, select who will be signing the contract.
You’ll get to choose from the following options:
- Me Only,
- Me & Others, and
- Others Only.
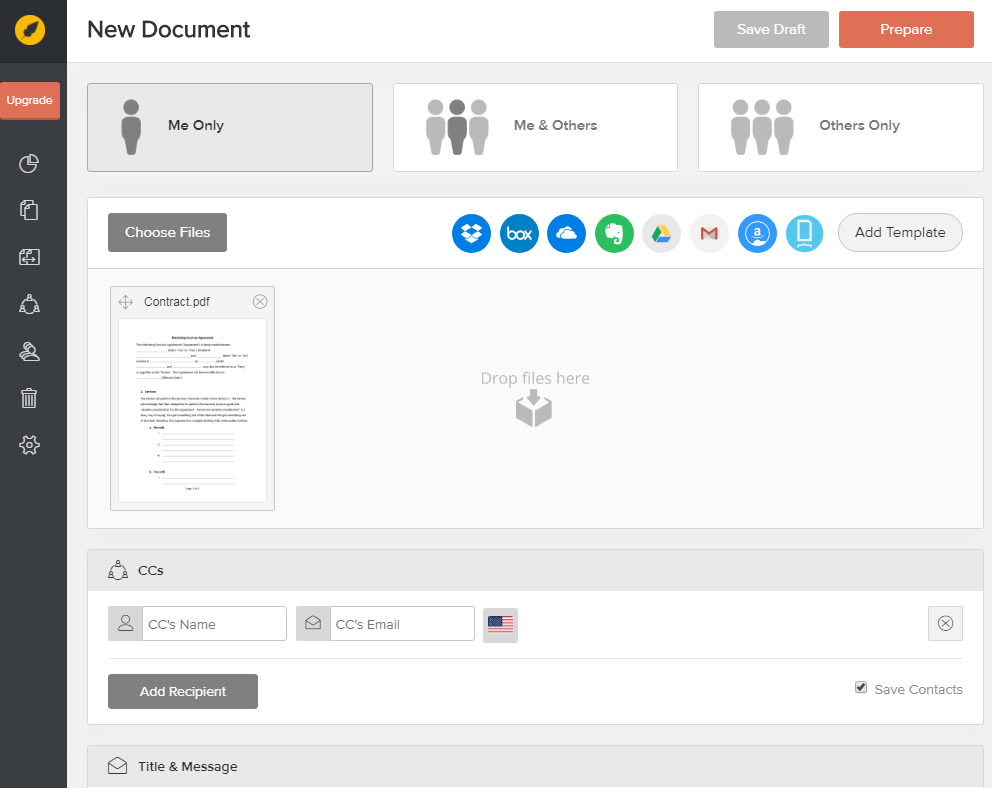
Here’s a breakdown of what these options mean.
- Me Only
If you’re the only one that needs to sign the contract.
- Me & Others
If you and others need to sign the document.
- Others Only
If only others are signing the document.
For now, let’s focus on the Me Only option.
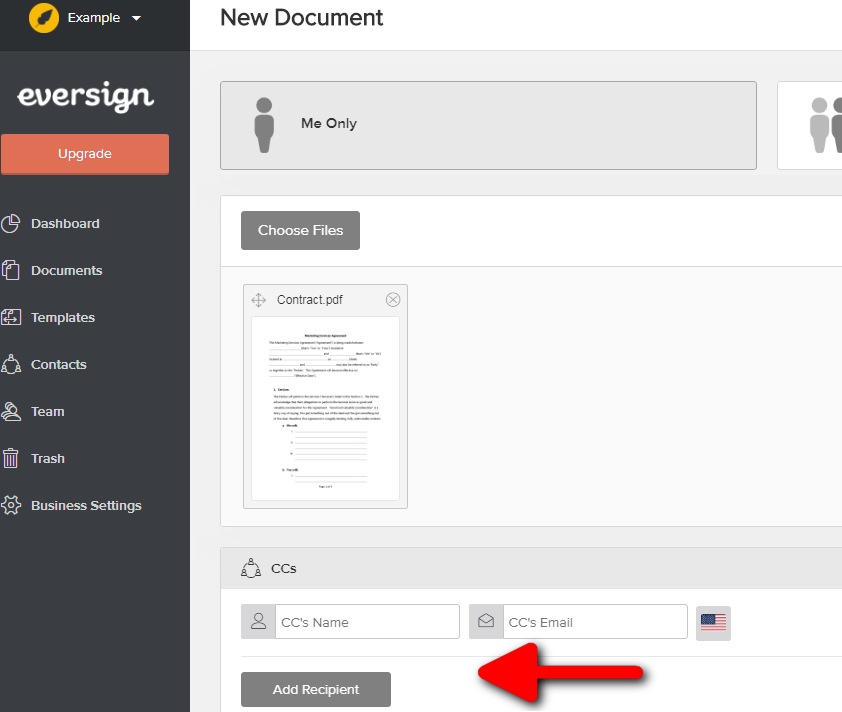
To enable easy sending, you can add a recipient and their email at this stage.
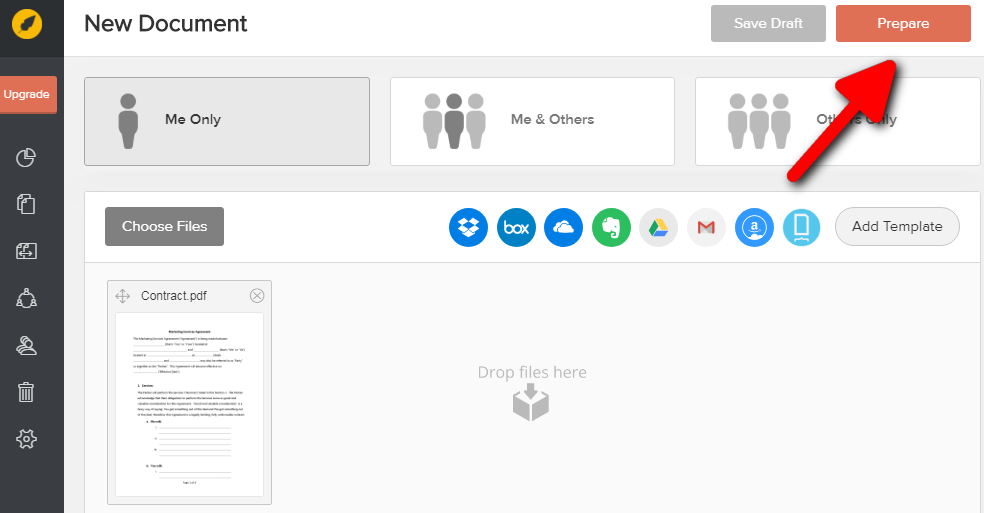
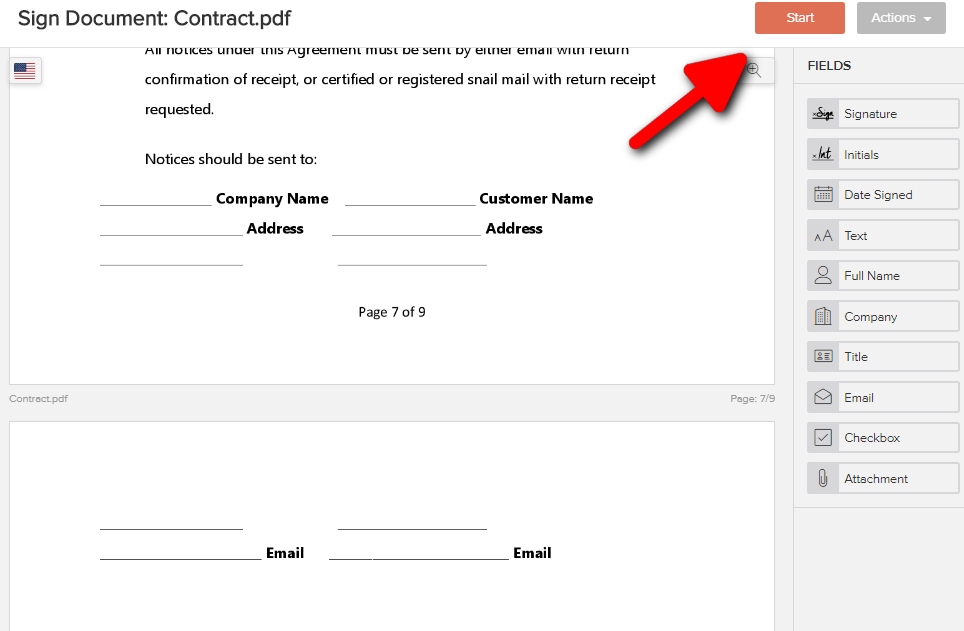
Your document is uploaded, and you’re ready to sign your contract inside the document editor. Next step is to click Prepare.
Now you’re inside the document editor. Scroll to the screen pane on the right and select the fields you need in your document.
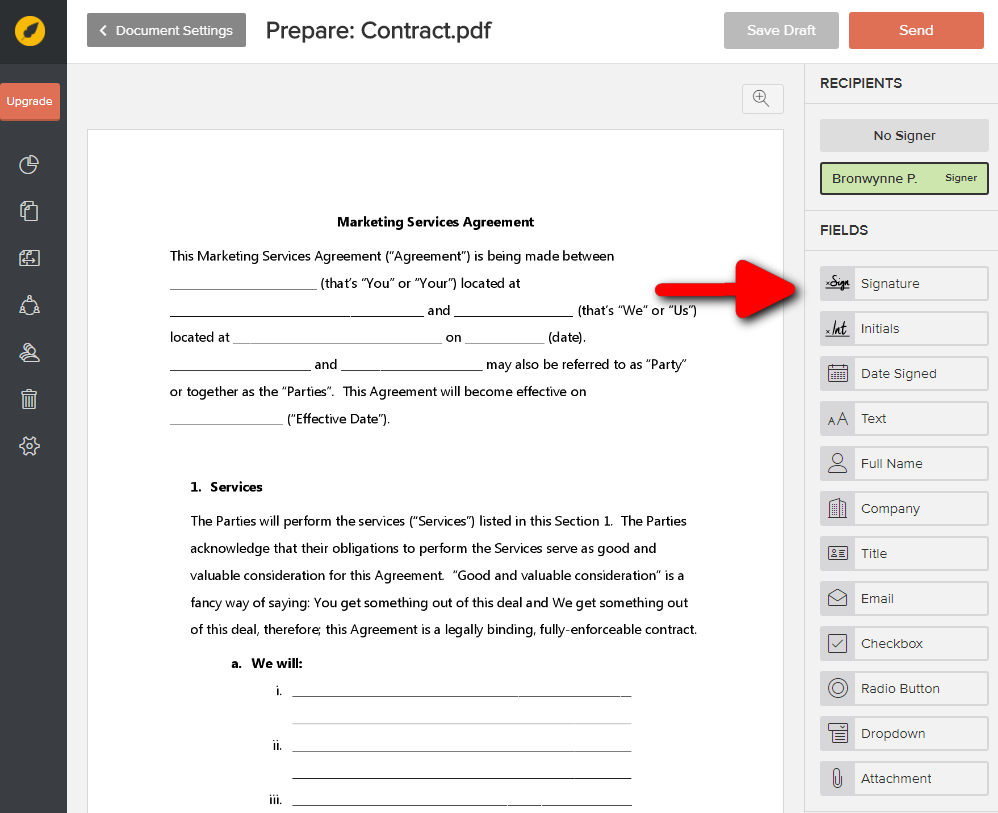
Depending on the nature of the contract, here’s where you create fields for the information you need to provide.
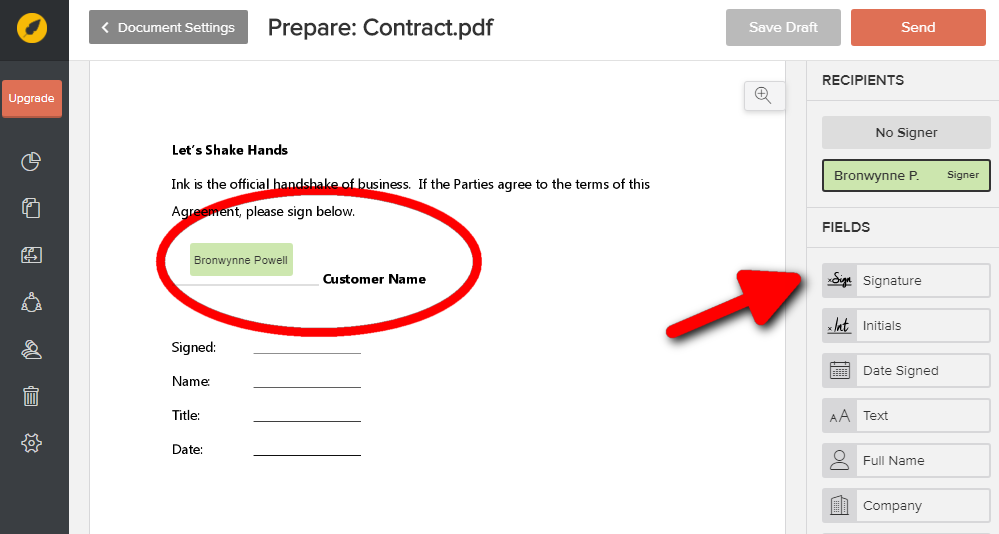
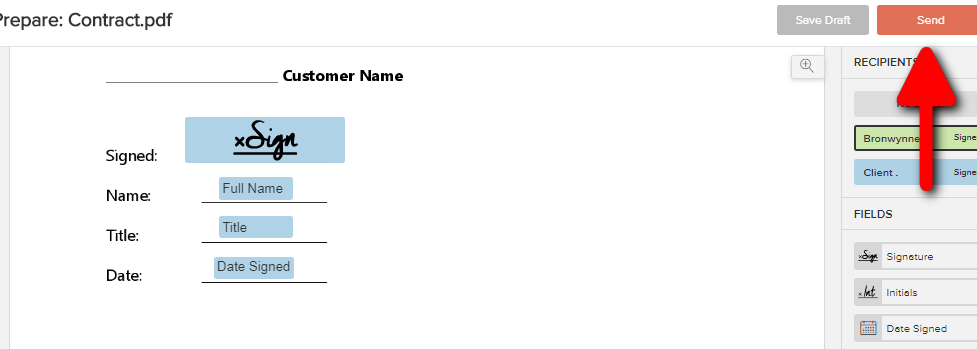
For this contract, I will select the Full Name, Signature, Title and Date Signed fields. Selecting your fields is as easy as dragging the ones you need and dropping those boxes into the contract.
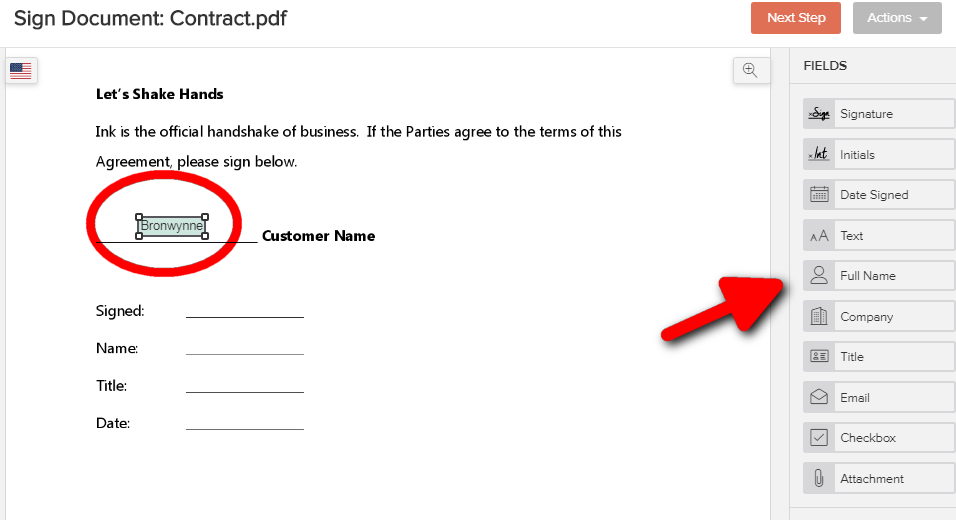
After I’ve added the Signature field, I can add my signature to the contract.
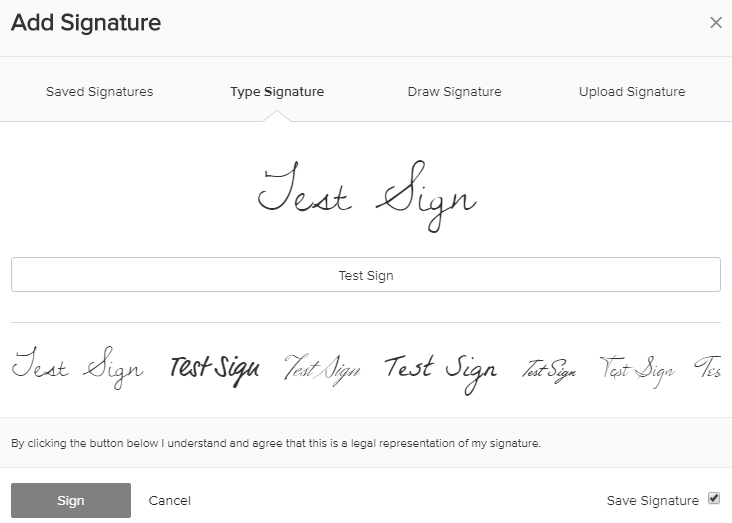
At this stage, you’ll be presented with three options.
You can:
- type a signature;
- draw a signature; and
- upload an image of a signature,
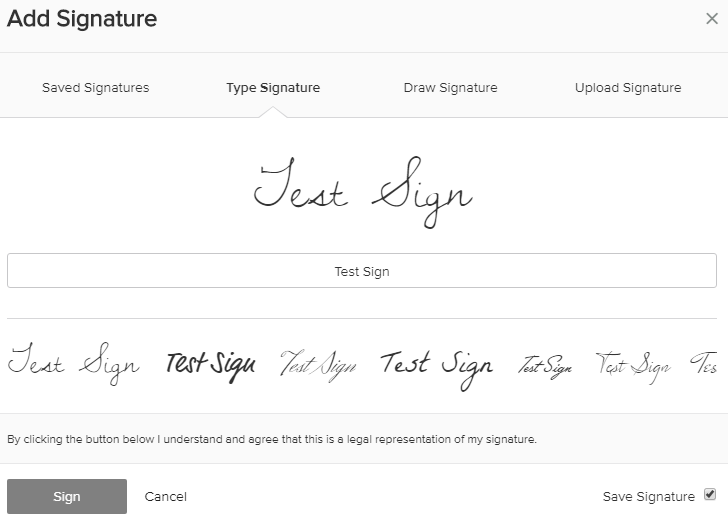
For this walkthrough, I’ll go with the Draw Signature option.
(Here’s a quick tip, click the Save Signature box to keep your signature saved.)
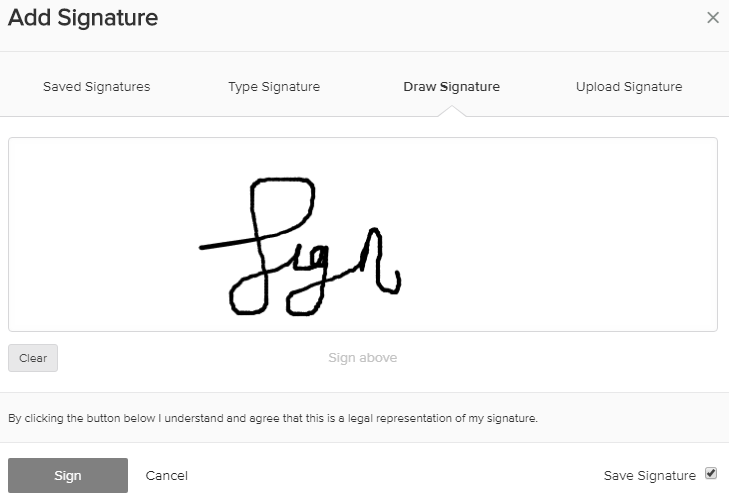
Once you’ve settled on the option that works best for you, sign your contract.
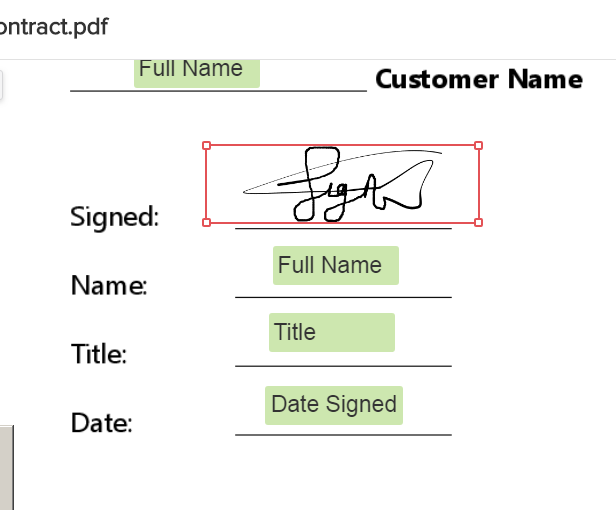
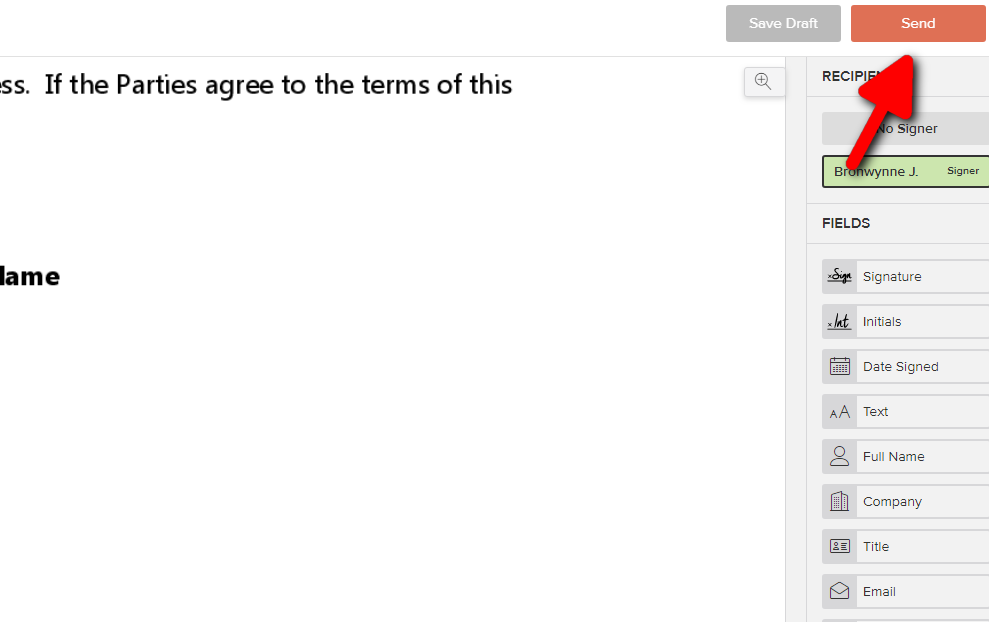
Now that your document is signed, go ahead and complete the remaining fields. Now, we can hit Send in the upper right corner. If you decided to add a recipient at the start, the document will automatically be sent to that recipient at this stage.
After you complete this step, you’ll be back in the dashboard, and the status of contract is signed. You can choose to download your PDF; if you didn’t add a recipient at the start of the signing process, you can send the contract via email now.
Signing a Contract With Other Parties
Many times, you may be preparing a contract that must also be signed by other people.
This is where you will use the Me and Others option.
While Xodo Sign accelerates any manner of signing processes, it makes a dramatic difference in getting multiple signers to complete the process quickly. There’s no back and forth due to incomplete contracts, and you can coach the process along easily and professionally by sending daily reminders to singers.
So you’ll follow the same process as above by logging into your Xodo Sign account, but now you’ll click Me and Others.
This time around, you will have a few more options. On top of adding recipients that will automatically receive the contract, you can also create a signing order if you need to.
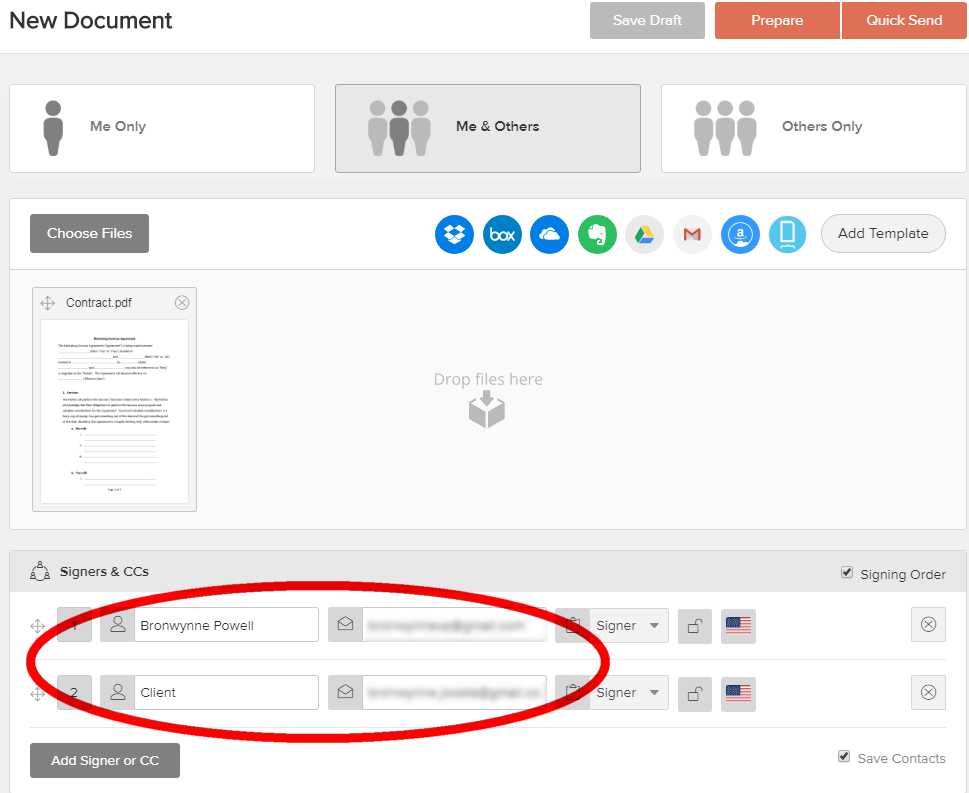
The next step is to prepare your contract inside the Xodo Sign document editor.
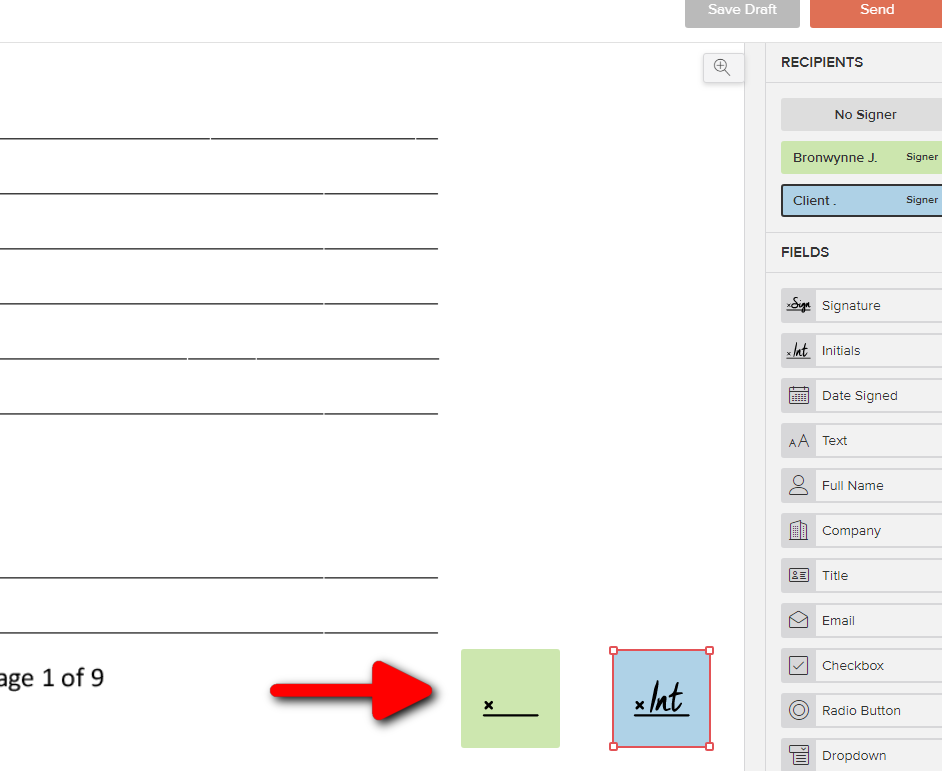
Now, this time you’ll see two tabs in the screen pane on the right.
- green indicate your fields, and
- blue for the other party, let’s say it’s a client.
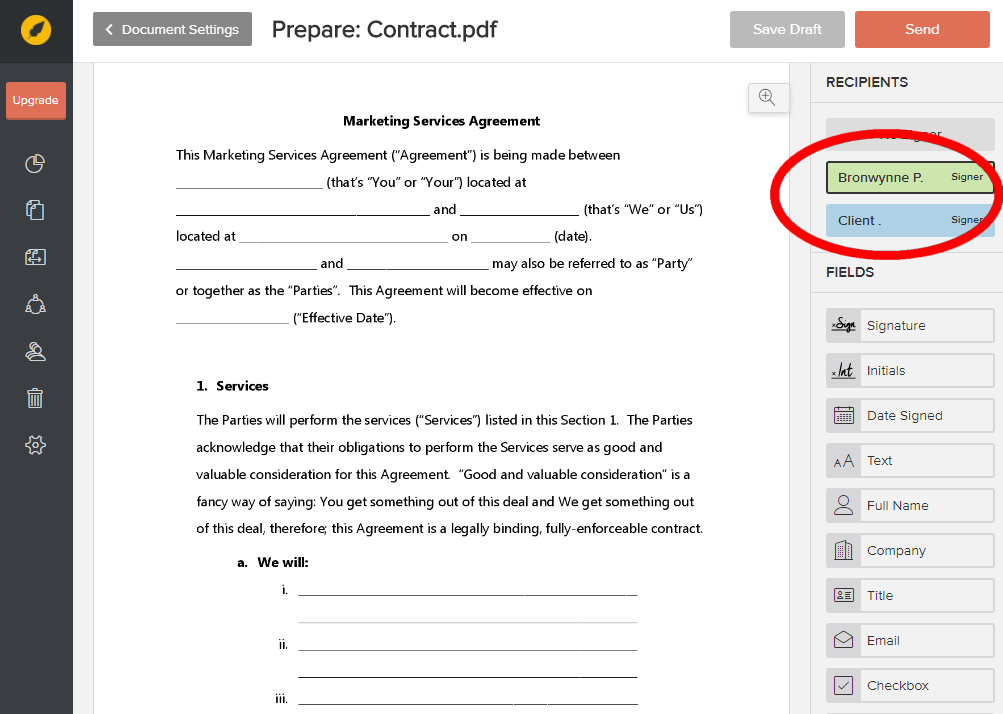
Now you can drag and drop the relevant fields for yourself and the client.
To drop signing fields for yourself or the other party, click on the relevant block and the field you want to add, and drag over to the document.
So, for this contract I want each page to be initialed, too. To create the fields for myself, I’d check Bronwynne P>Initials and drag the field onto the document. I’ll repeat the same process to create a field for the client’s initials.
Now, I can go ahead and drag and drop the relevant fields throughout the document.
Once you’re satisfied you’ve created fields for all the information you need, sign the document.
Again, you’ll be prompted to select from:
- type your Signature,
- draw your Signature, or
- upload your Signature.
Once you’re done, click Send.
The other party will automatically receive a copy of the contract.
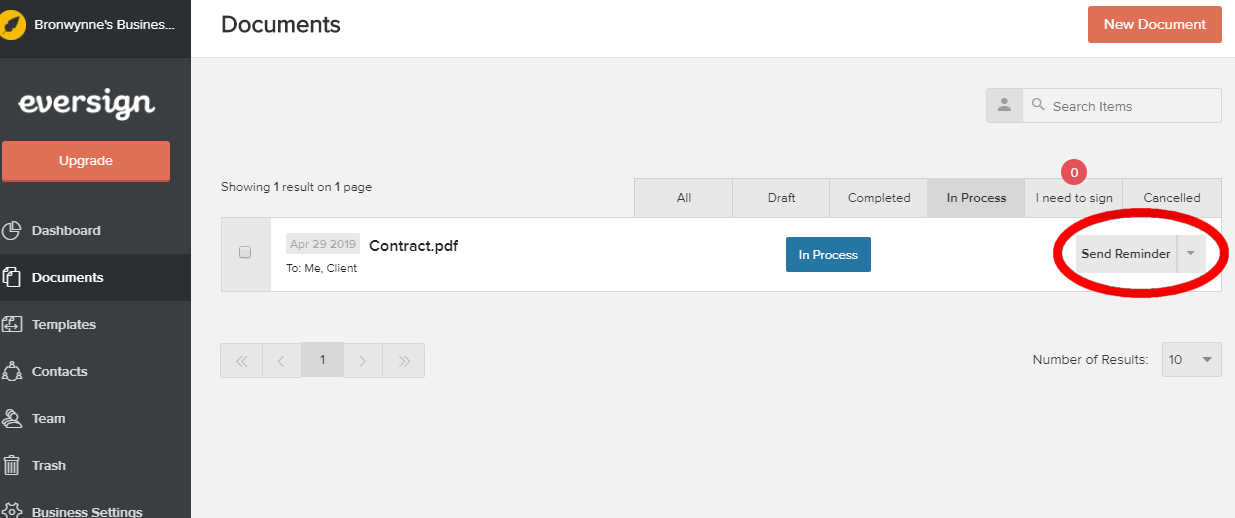
You can track the status of the document inside Xodo Sign by heading over to your dashboard and clicking Documents. Here you have the option of reminding the other party to sign the document. This is a nifty feature and removes the drudge work of manual follow-ups.
Signing Contracts Using Xodo Sign’s Chrome Extension
When you install Xodo Sign’s Chrome extension, you can sign documents within your Gmail account or Chrome’s PDF viewer. This makes it even simpler to sign and share contracts with business contacts.
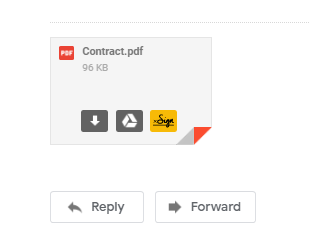
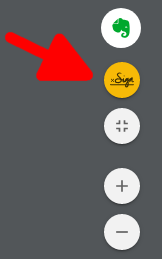
To begin, go to Gmail and the email containing the contract you want to sign. You’ll see the yellow Xodo Sign icon.
Again, you’ll see the different signing options. We’ll choose Me Only this time.
If this all looks familiar, it’s because you’re back inside Xodo Sign's document editor.
Click Start to prepare your document.
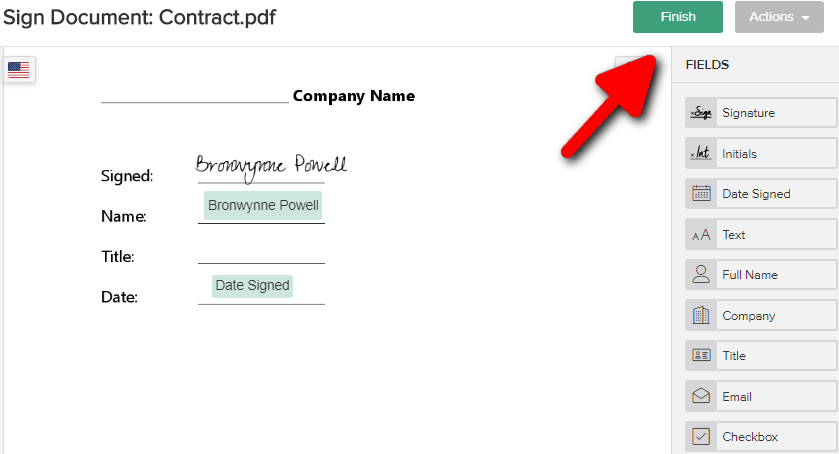
I’ll drag over the fields I need like Signature, Full Name and Date Signed.
Once you click Sign, you can select from the different types of signatures.
After you’ve completed the fields, click Finish. (Note: The date is added automatically when you finish the document.) A new window will open in your Gmail account and you can send the contract back.
To sign contracts in Chrome’s PDF viewer, click on the Xodo Sign icon from the screen pane on the right and follow the same steps as above; click Start, select the required fields, sign and click Finish. This time around, the contract is stored in your Xodo Sign account. You can download and send to the other party.
You’ll see the process for signing a contract online is pretty much the same whether you’re signing inside your Xodo Sign dashboard, your Gmail account or Chrome’s PDF viewer.
While this was a detailed walkthrough, the whole process only takes a few minutes. It’s intuitive, fast and secure.
Tips for Signing Contracts Online
If you’re ready to transform the way you sign contracts online by switching to electronic signatures, keep these criteria in mind:
- Always convert to PDF before sending the contract.
- Make sure your solution complies with regulations.
- Look for eSigning software that offers an audit trail.
- Opt for an eSigning platform that comes with secure cloud storage for your contracts.
Start Signing Contracts Online Today With Xodo Sign
Gone are the days of printing, scanning and emailing - or even faxing - contracts. Electronic signatures are transforming the way we do business.
Now you can create, send and store documents securely online in a single platform.
If you’re on the hunt for an easy and secure way to sign contracts online, try Xodo Sign today.