This is a step-by-step guide on how to create and send a document with Xodo Sign, to be legally signed online on any computer or mobile device.
Let's say you're a real estate agent who's about to sign a contract with a home owner who wants to sell her house with your help. You now want to send her the contract to sign.
Instead of sending it to her via email to print, sign, scan and send back to you, you can speed up the process with Xodo Sign, the free electronic signature solution.
With Xodo Sign, she can sign online, legally binding, from a computer or a mobile device.
Here's how easy it is to create a document in Xodo Sign and send it to be signed:
Log in to your Xodo Sign account or sign up for a free basic account if you don't have one (it only takes a minute!).
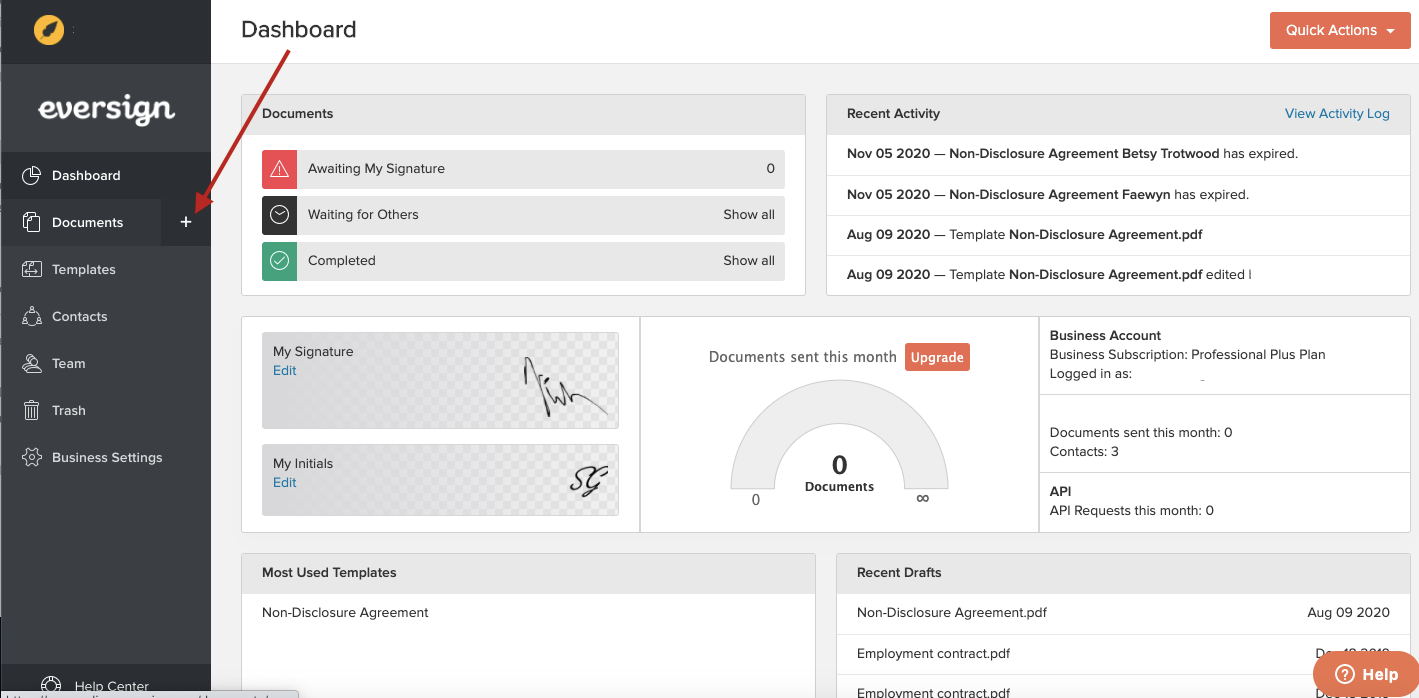
From your dashboard, click on the "plus" sign in the "Documents" section in the left hand menu in order to create a new document. The "plus" sign will appear when you hover over the "Documents" link.
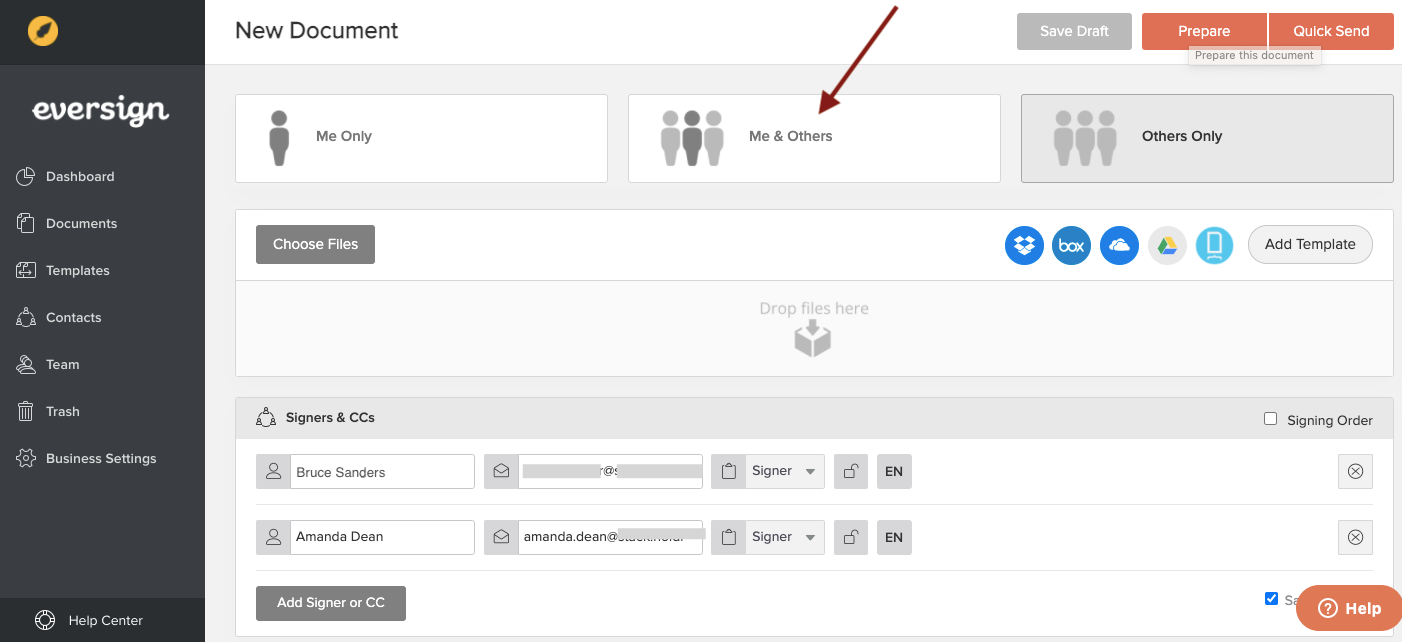
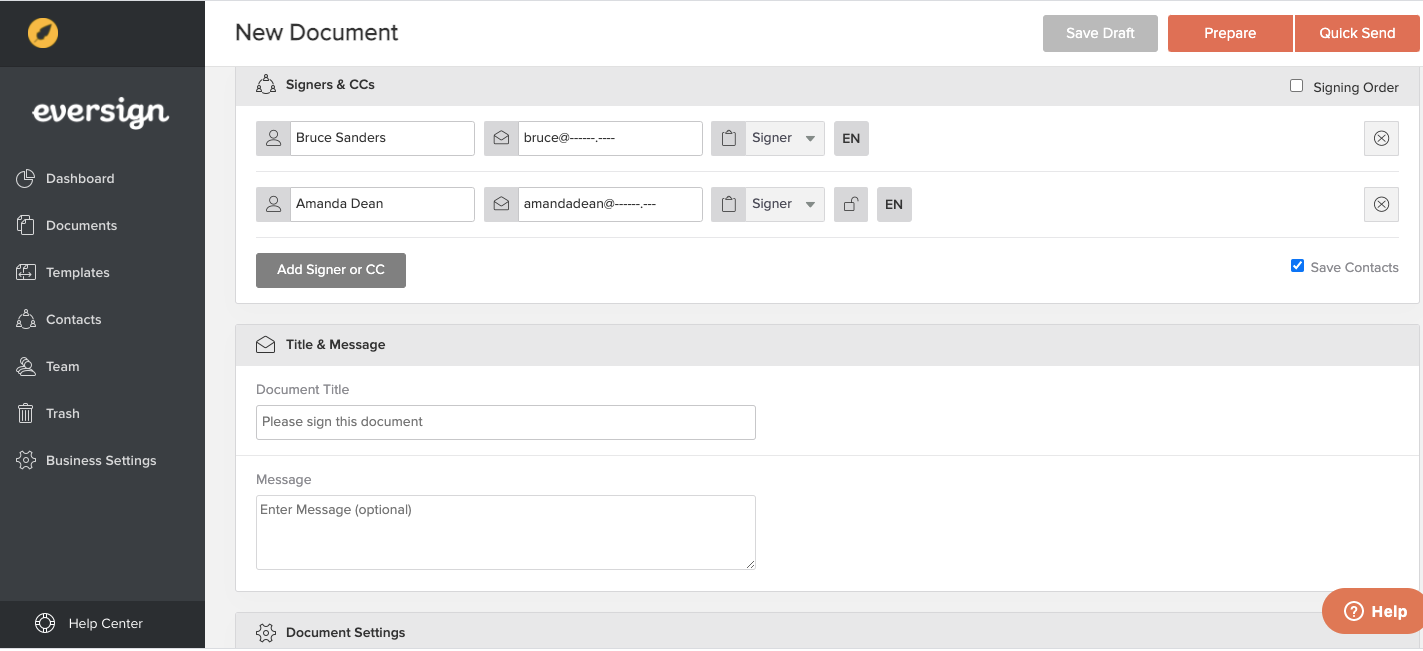
You're now on the "New Document" page. You can choose who has to sign your document from the options "Me only", "Me and others" and "Others only" by clicking on the respective box. In our example, you want the agreement to be signed by you as well as by your client, so click on "Me and others".
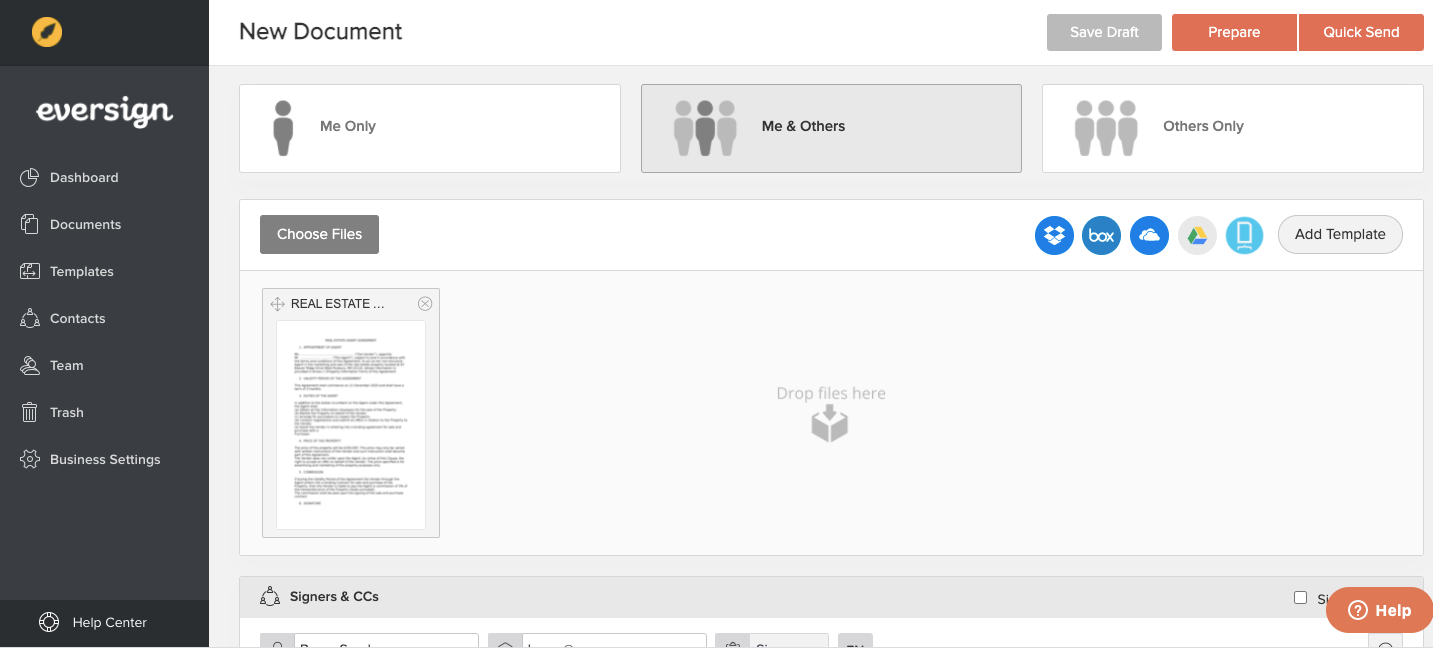
Next, you need to upload the agreement that you want to send.
The easiest way is to drag and drop it, but you can also use the "Choose files" button on the lefthand side and look for it on your device or you can upload it from Dropbox, from Google Drive, Docracy or other sources.
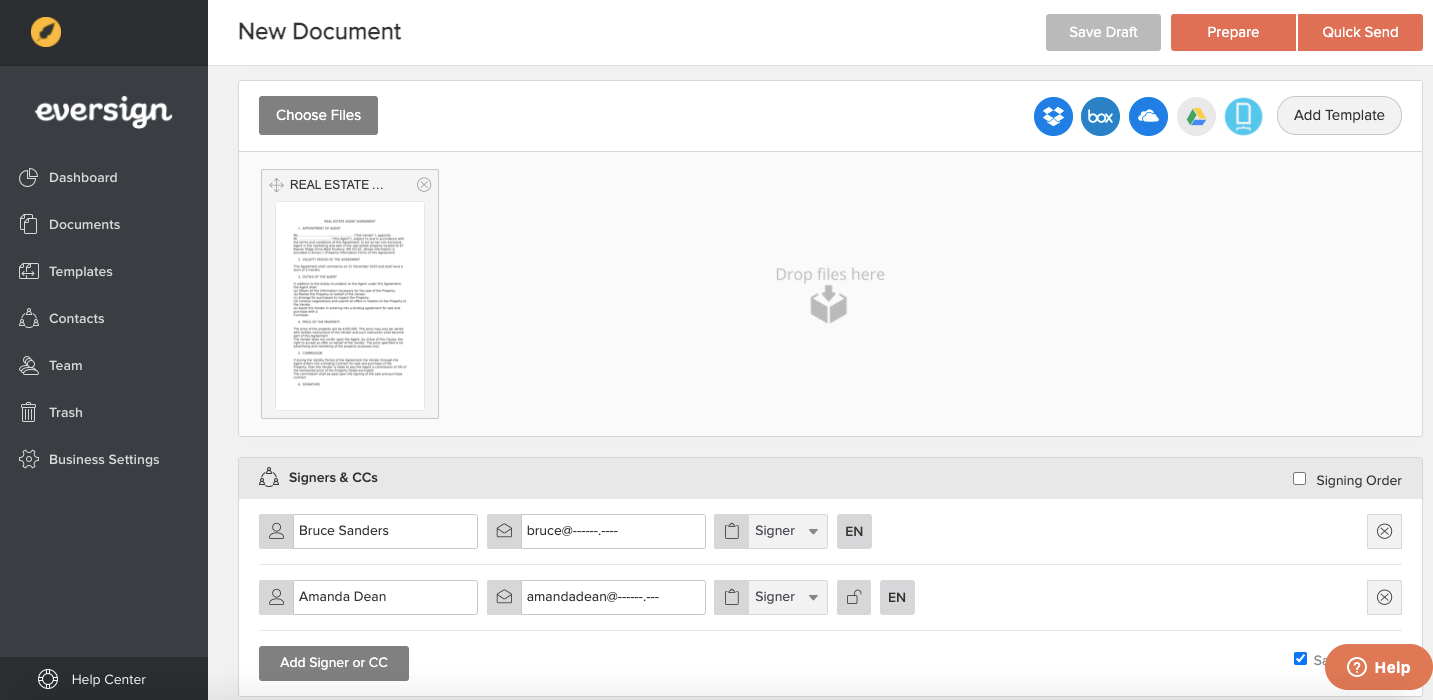
In the next step, you must enter the signers' names and email addresses. As we chose to have the document signed be "me and others", the first signer is you.
In addition to signers, you can also send the document to other recipients, who will not be able to sign it and will have read-only rights. If you want to send the document to a recipient who is not a signer, click on the "Add signer or CC" button, then enter the person's name and email and click on the "Signer" drop-down menu to the right of the email and choose "CC".
Added security
If you wish to add an extra layer of signer authentication and security, you can add a signer PIN. In order to do that, click on the padlock symbol next to the person's name and email address and enter the desired PIN in the popup window. Any signer with a Signer PIN assigned will be required to enter this PIN in order to be able to view and sign this document. Make sure you send the person the PIN through a different channel, for example via text message.
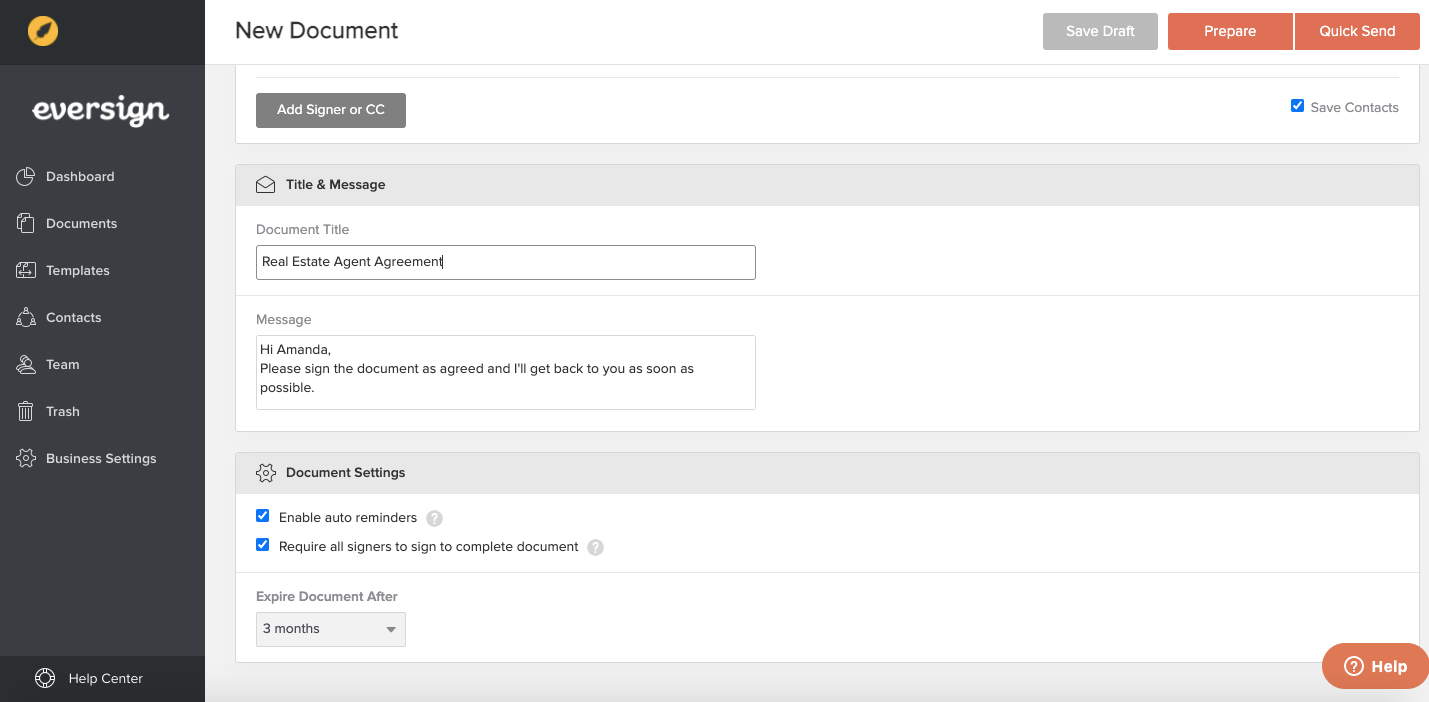
Next, you can choose a title for the document (this title will be the subject of the email) and a personalized message for the signer/recipient (optional).
If you don't choose a title and a personalized message, the email the signer/recipient will receive from Xodo Sign will have the following subject and content (the brackets will contain your information):
Email subject:
Please sign this document - (file name)
Email body:
"You are requested by (sender name) to sign this document.
(file name)
Requester: (Sender name) (sender email address) on behalf of (sender)
Review & Sign (link)
You can view this document's status by clicking the following link: View Document Status
You can reply to this email in order to deliver a message to (sender name).
Processed by Xodo Sign on behalf of (sender).
Preparing the document
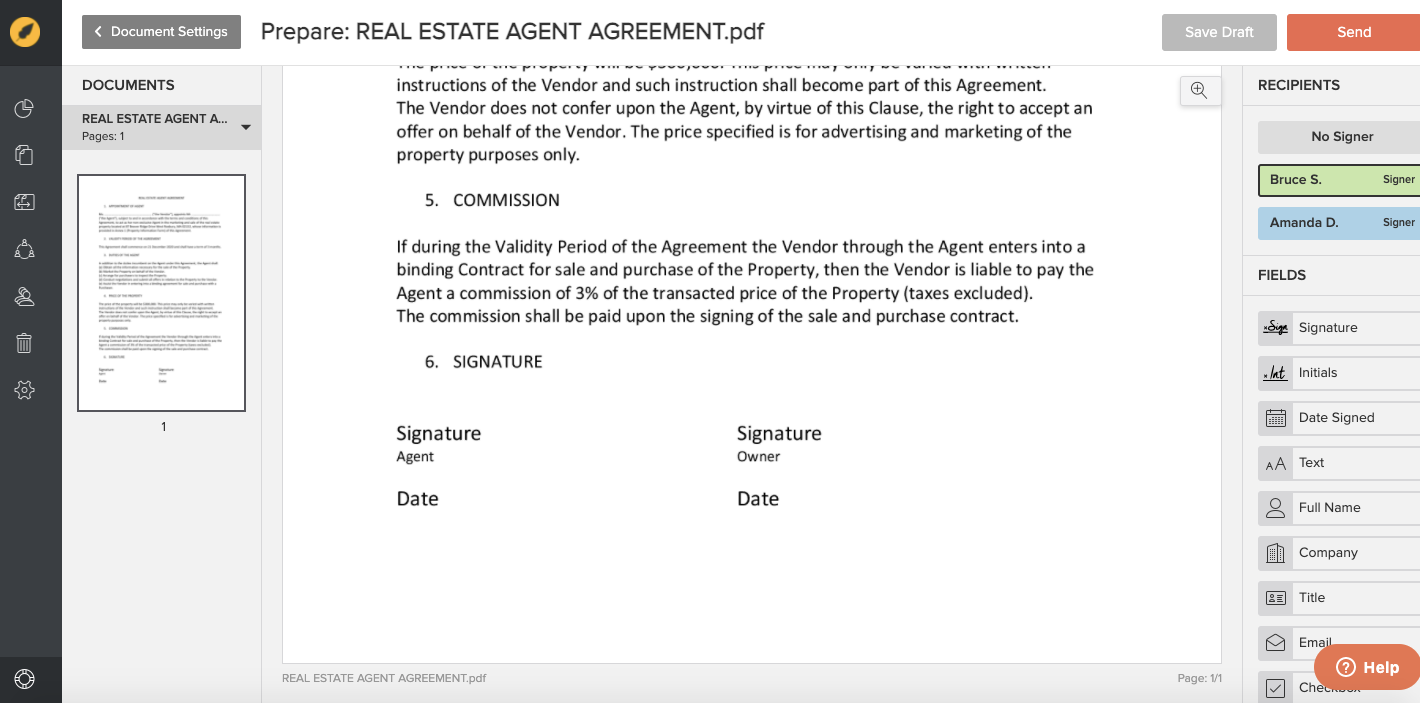
Before sending the document to be signed, you need to prepare it, by adding signature fields and any other fields you find necessary, such as date, names or roles of signers.
If you are in a hurry, you can quick-send the document without preparing it. If you do that, Xodo Sign will automatically attach a signature page to the end of your PDF.
Both the "prepare" and the "quick send" buttons are in the top right corner of the screen.
In our case, we want to add two signature fields - one for you and one for your client - as well as date fields.
Click on the orange "Prepare" button in the upper right corner. This will open your document and the editing interface.
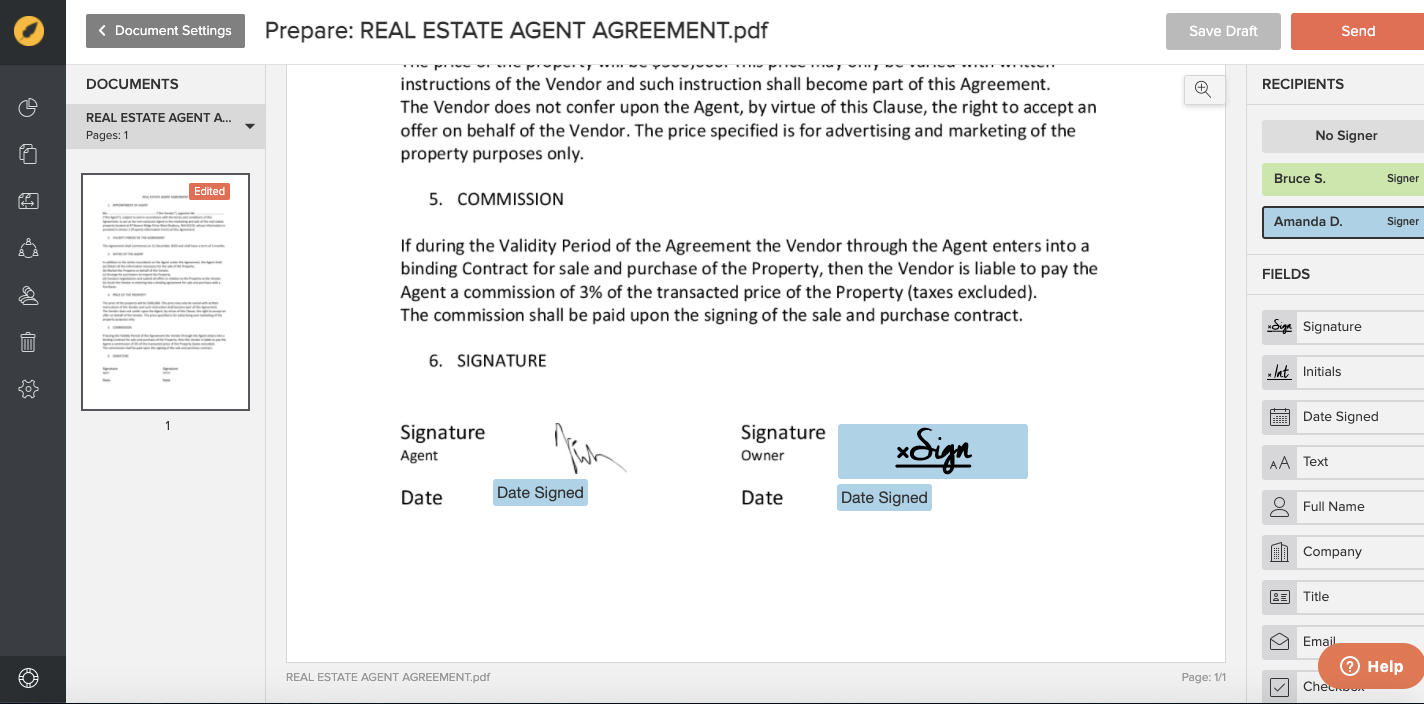
Let's add the signature fields first, beginning with your own. In the right hand menu you can see the names of the signers; click on your name. The fields you will add to the document now will refer to you. From the fields in the right had menu, drag the "Signature" field and the "Date signed" field to the desired places in the document.
When you drag your own signature field into the document, a signing platform will pop up, where you can sign the document.
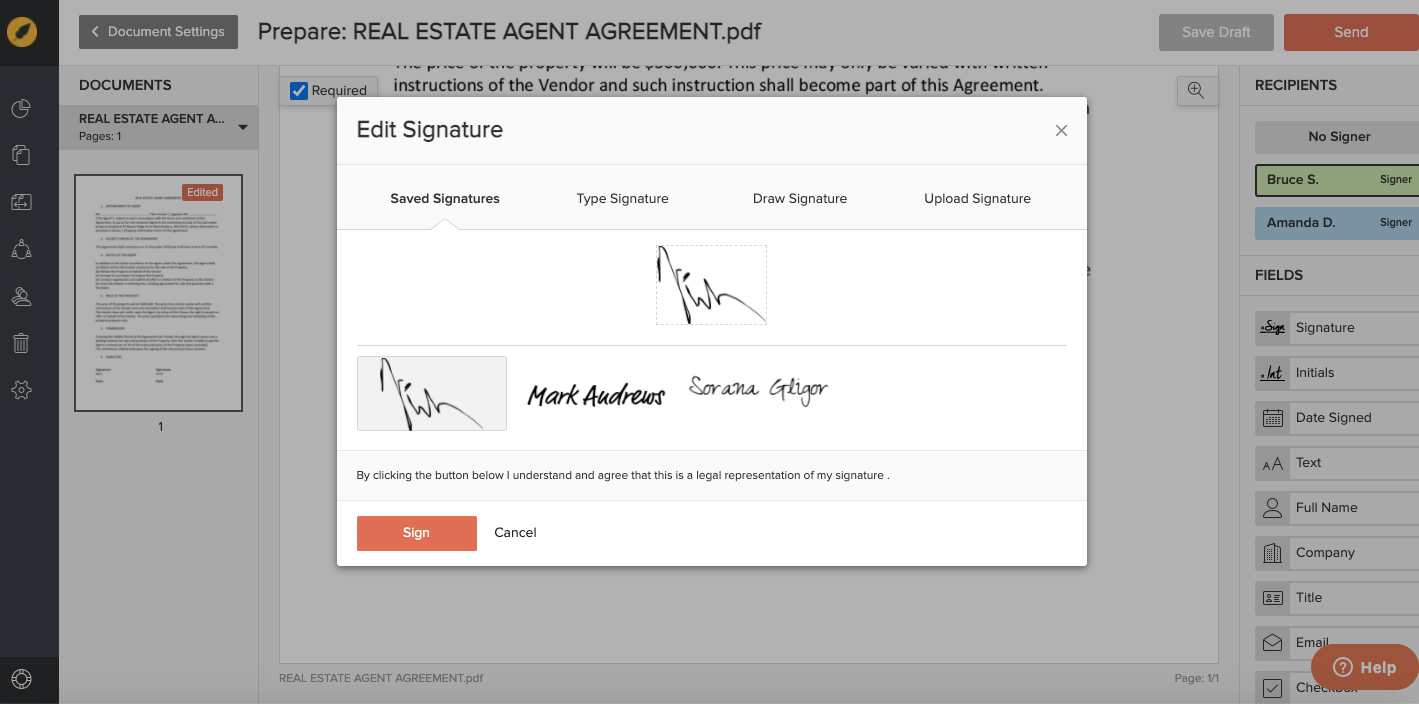
You have three options for signing the document:
- by typing your name in the pop-up window
- by drawing your signature with the mouse, finger or tablet pen, depending on the device you are using
- by uploading a photo of your signature
After signing, click on the orange "Sign" button (see image above).
You only need to drag and drop the "Date signed" field in your desired place in the document, the date will be filled out automatically after you sign and complete the document.
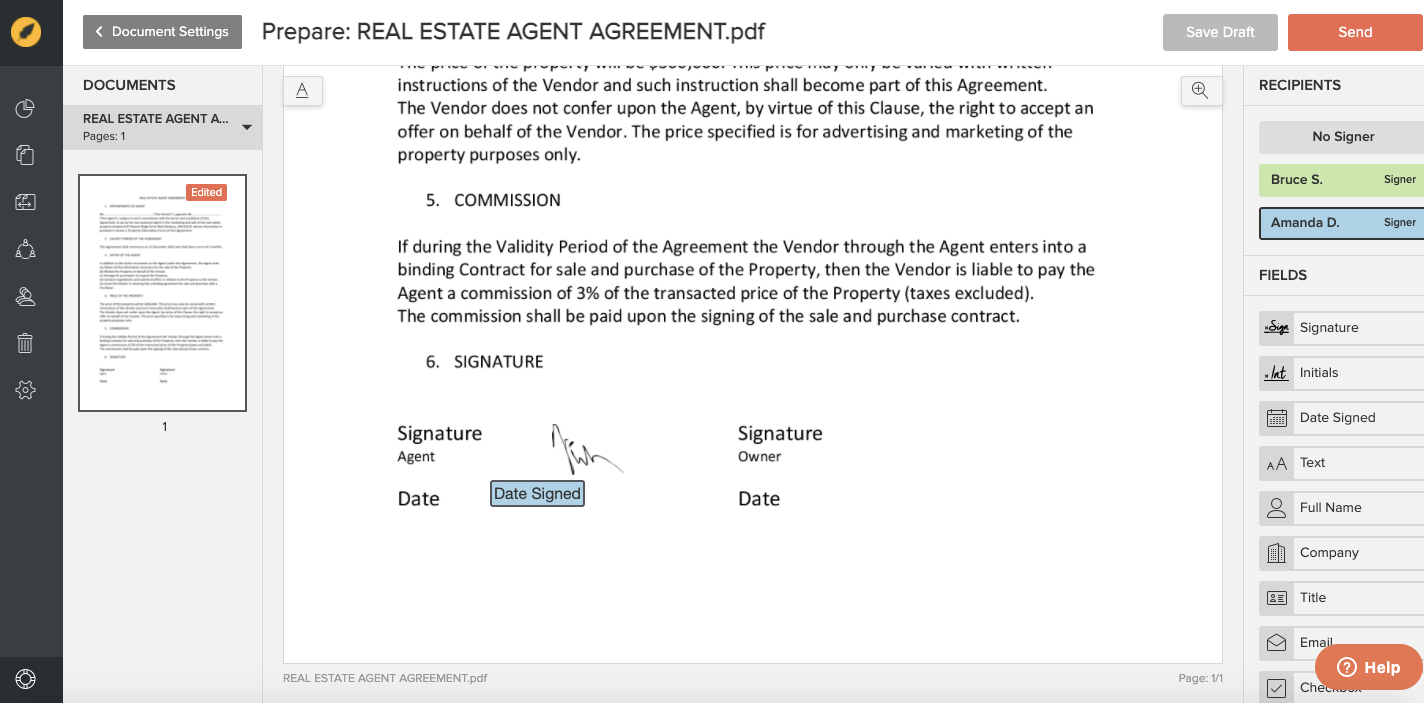
Next, click on the second signer's box in the right hand menu, in our case Amanda D., and drag and drop the respective fields in the document ("Signature" and "Date signed").
Your new document is ready! Now you can send it to be signed by clicking on the orange "Send" box in the upper right hand corner or save it for later by clicking on the gray "Save draft" box next to it.
Now you can see your new document in the documents list, as well as its status (queuing, in process, completed), who has already signed it and whose signature is outstanding.
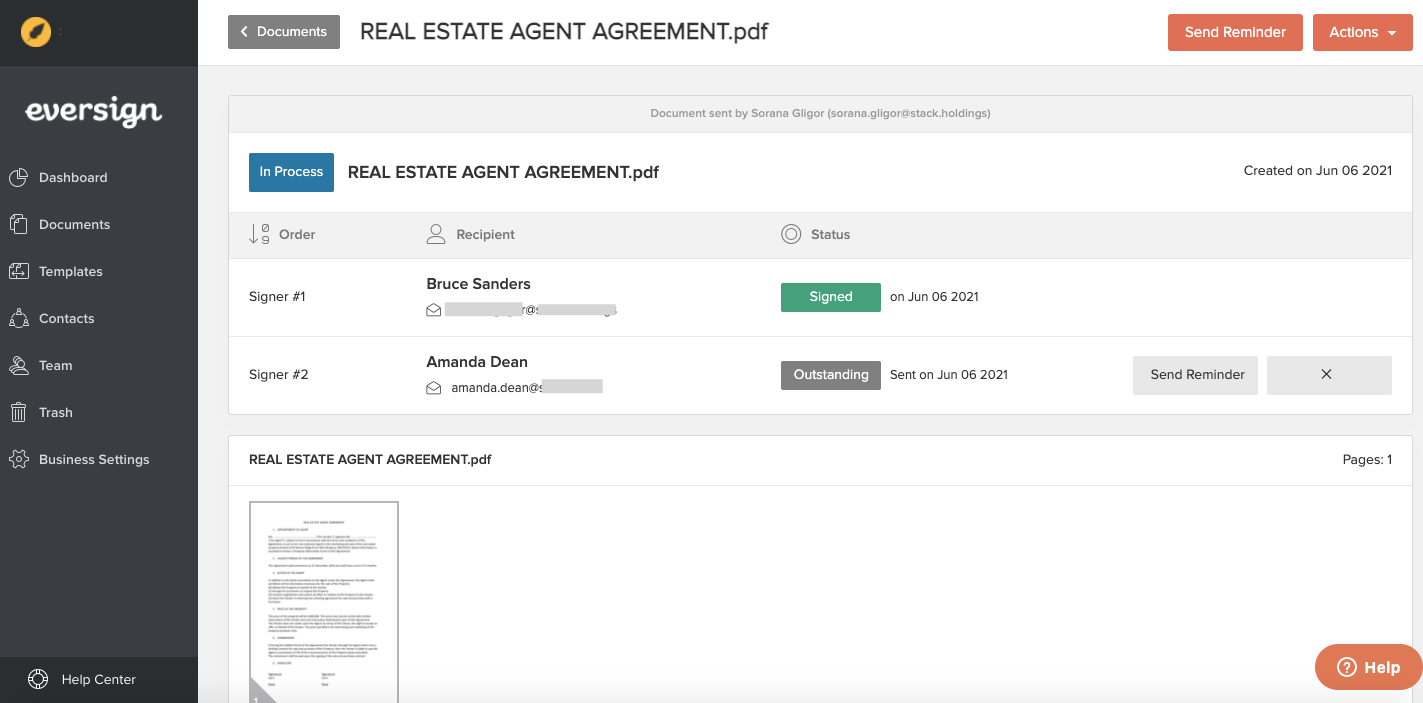
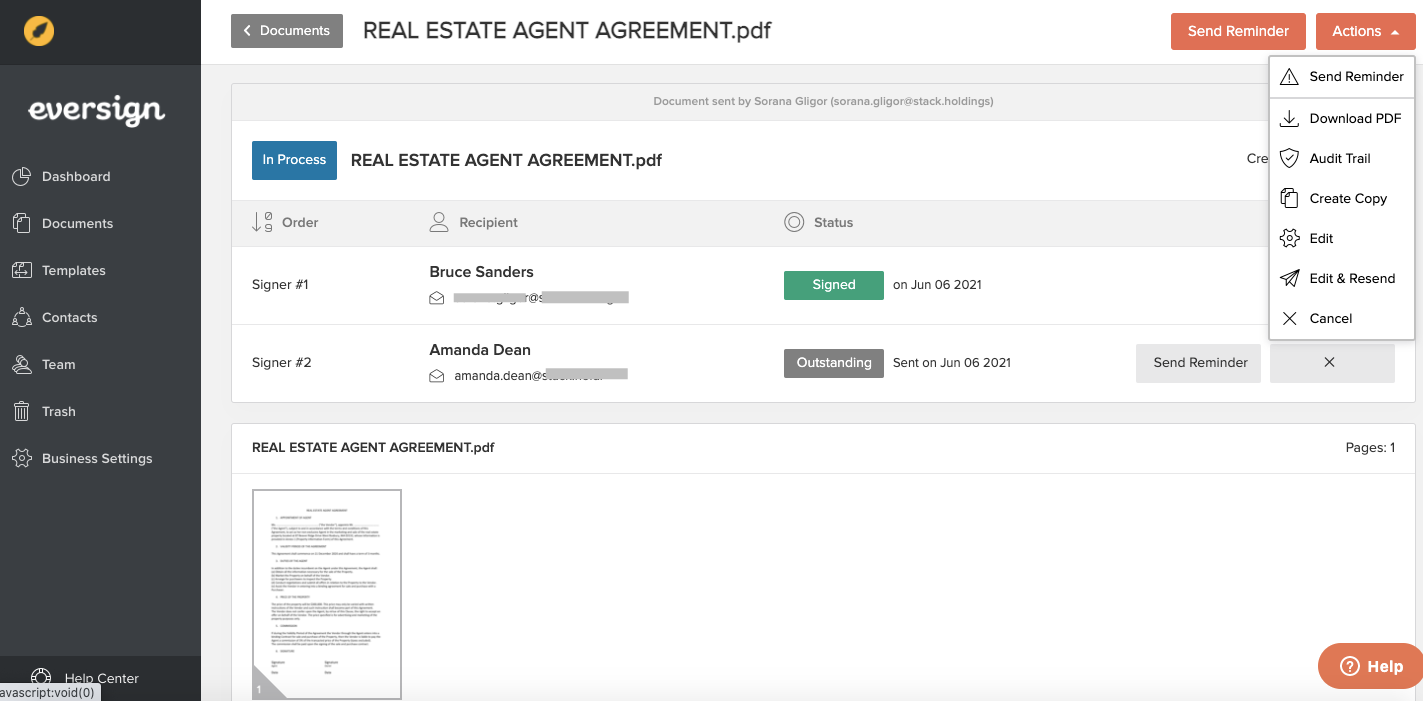
After you send the document to be signed, you will be able to do a set of actions with it, for example edit it, download it as a PDF file, create a copy, send reminders, etc. You can choose these actions by clicking on the orange "Actions" button in the upper right hand corner.
If you haven't sent any document to be signed with Xodo Sign yet, why don't you do it today? It's fast and easy and you can try it for free!