Thinking about going paperless? Well, if you have access to basic technologies, you can easily do so.
In business, paperwork is a part of your daily tasks. You have to sign contracts, fill out HR documents for new hires, and email documents back and forth to co-workers and clients.
The amount of paper American offices produce per year is an astonishing 10,000 pages. And it’s no better around the world.
In the U.K. businesses use an average of 45 sheets of paper per day and two-thirds of that goes to waste.
Wherever you are in the world and for whatever reasons you’re trying to go paperless, you can do it using a desktop, smartphone, or tablet.
A great first step is to start scanning documents and emailing them vs making copies and mailing them. You can even use a platform like Xodo Sign to scan, upload, and sign important business documents.
But more on that later. Let’s take a closer look at how you can scan and email documents.
Scanning a Document Using a Mobile Device
Both smartphones and tablets are capable of scanning documents. But it’s more than simply snapping a photo of a contract to make it an official scan.
You’re going to need a special app like Tiny Scanner, Cam scanner, or Microsoft Office Lens. These will take your snapshots and turn them into scanned PDF copies.
Another option is to use Google Drive. This is the preferred option if you’re using an Android device. Most smartphones today come with the Google Drive app already installed.
Here’s how you can use it to scan and send a document.
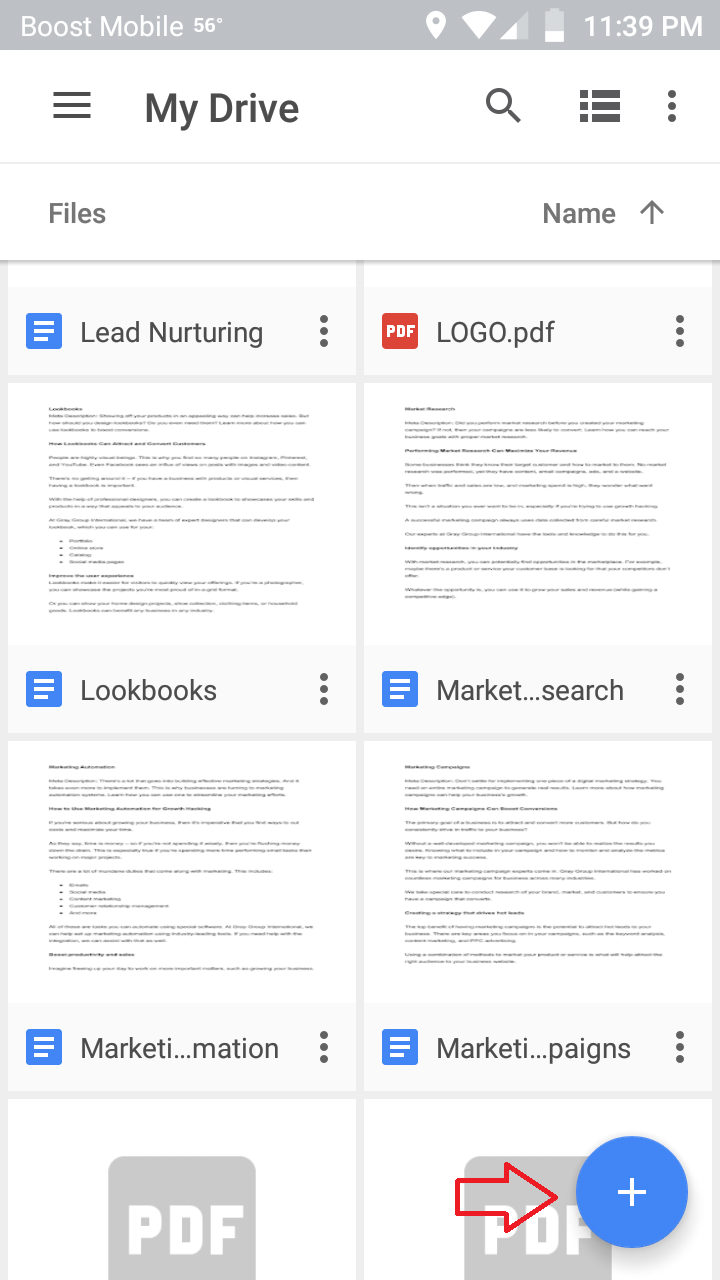
Step One: Open Google Drive
Click on the Google Drive app in your smartphone. Once it opens, you’ll see all of your documents.
Select the + symbol in the bottom right corner.
Step Two: Click the Scan Option
A small window will pop up at the bottom of your screen. In the top row, select the camera symbol to initiate the scan option.

Step Three: Take a Snapshot of Your Document
Now, position your camera over the document you’d like to scan. If you have multiple pages, don’t worry.
You’re going to do one page at a time.

Step Four: Scan Document to PDF
Google Drive will now convert your image file into a PDF. At this point, you can either choose to take a snapshot of another page (+ sign) or retake the snapshot of the current page (return sign).
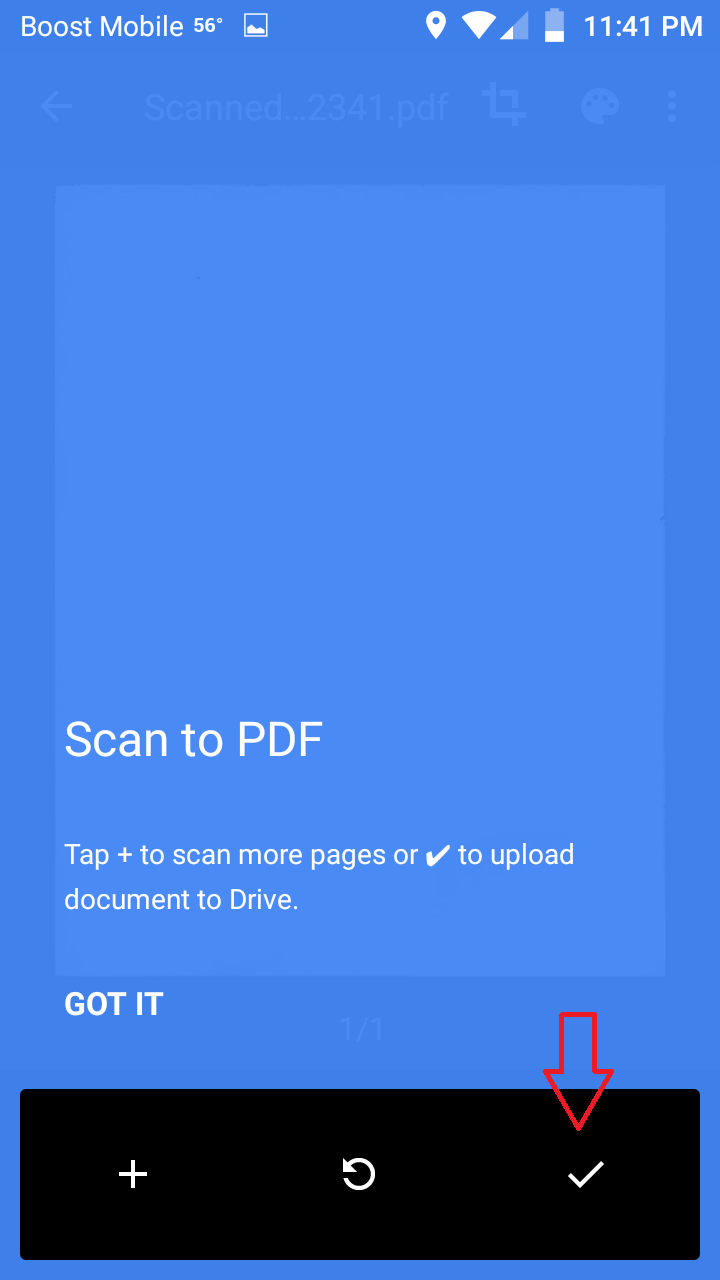
Once you’re ready to move on, click the check mark symbol.
Step Five: Send the Document to Recipients
Now, you’ll find the scanned document in your Google Drive. Once you click on it, you can select the three dots in the upper right corner.

This will open up a menu where you can choose to either add people. Select this if you want others to have access via Google Drive.
Otherwise, you’ll select “send a copy.”

From here, you can choose to send the document using Yahoo, Gmail, or another connected emailing tool.
Insert the email address and hit send. You’re all done!
How to Scan and Email Documents On Desktops
If you’d like to scan and email documents using your desktop, you’ll first have to set up your hardware. You’re going to need a printer with a scanner or a standalone scanner to do the job.
Most operate the same – you place the page inside the scanner and then hit the scan button (either on the device or on your computer using the software).
- Once the scan is complete, you can add additional pages, or hit browse to select the folder you want the documents stored in.
- From here, you open your email of choice – Gmail, Yahoo, or Hotmail.
- Select “compose message” and insert the subject and recipient’s email.
- Click the attach button (typically looks like a paper clip) and find the document location (wherever you saved it).
- Once it’s uploaded, you can click send.
Alternative Way to Upload and Email Documents
In business, you need processes and systems that are efficient and secure. Emails don’t always offer this.
This is why you’ll find some companies now using cloud tools, such as Xodo Sign. On our platform, you can upload documents and send them to recipients via email.
The documents are accessed and signed through the platform for security.
To upload a document to Xodo Sign, you first have to scan the document using the steps above. Then rather than emailing it, you sign into Xodo Sign and find the document’s location and upload it directly to the platform.
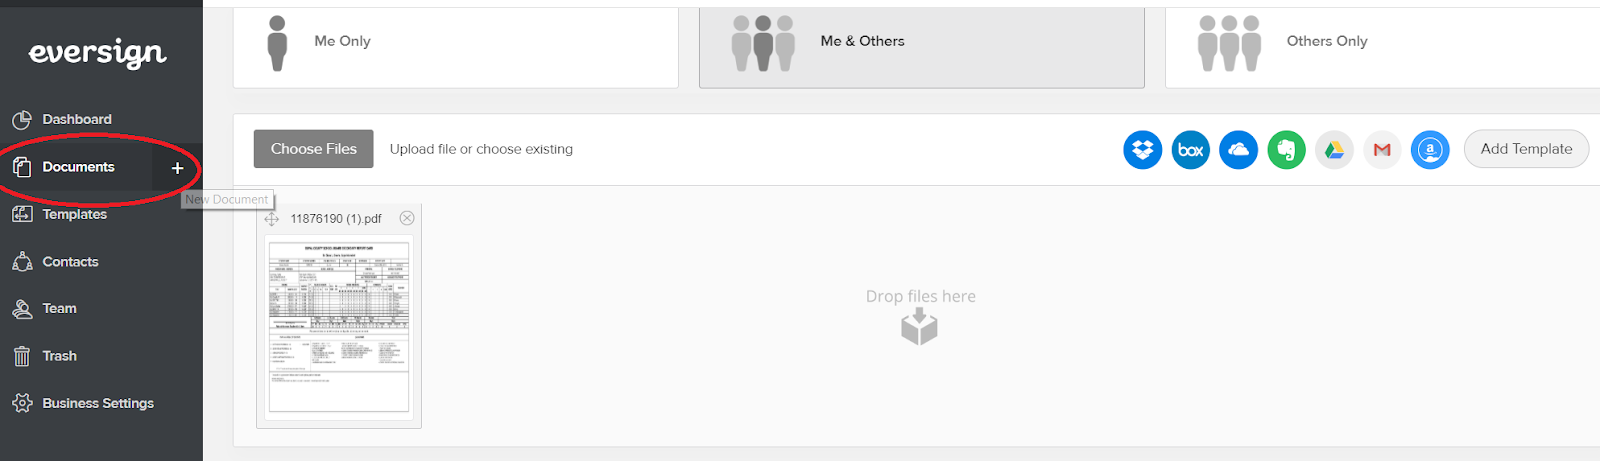
To do this, hover over the Documents section and click on the + symbol.
Next, click on “Me and Others.” This will make you and other recipients the signers of the document. Or you can choose “Others Only” if only other people must sign it.
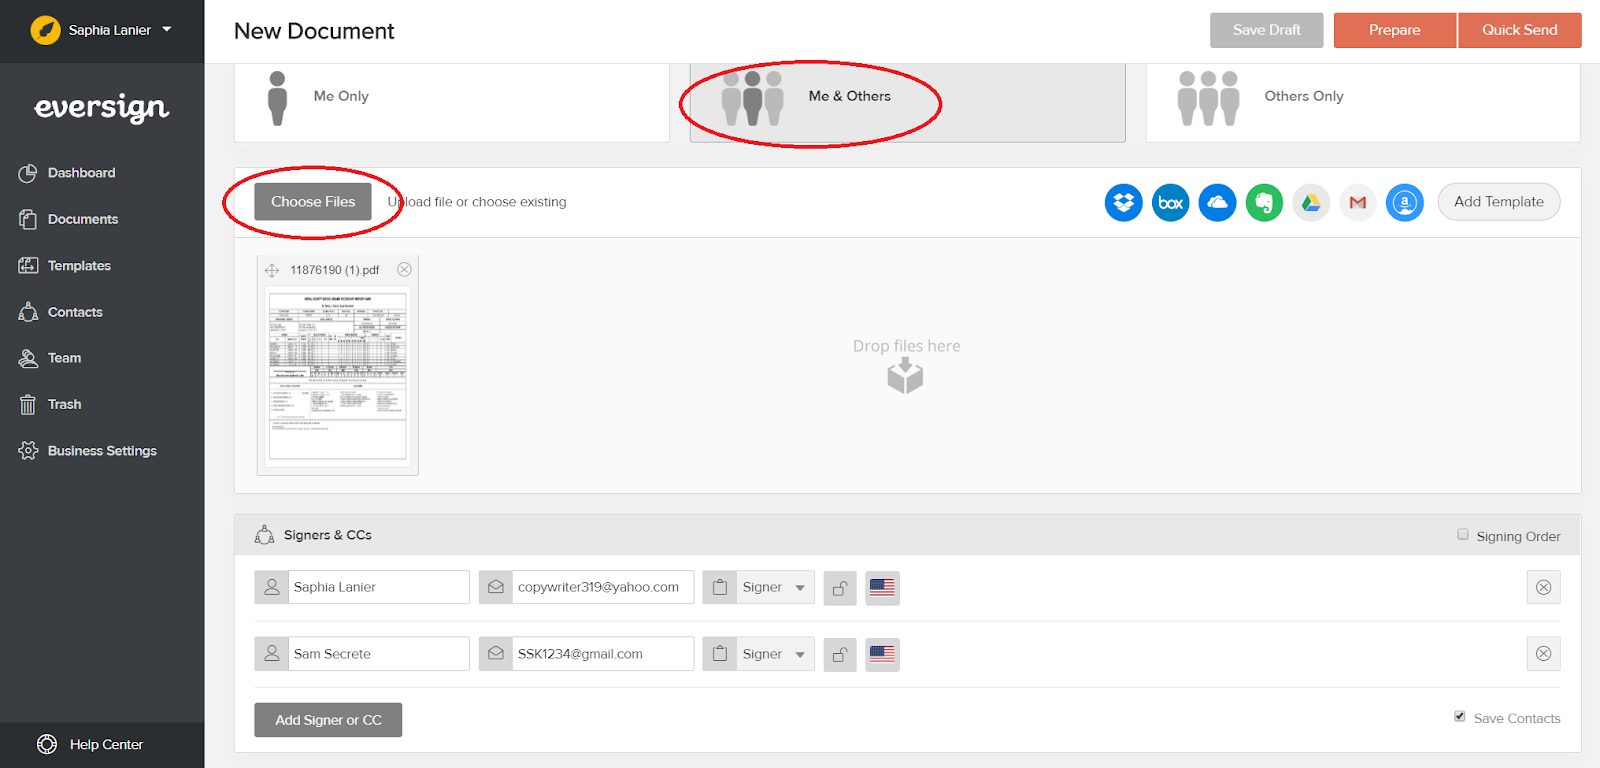
Then click “Choose files” and locate the document you scanned using your smartphone or desktop.

Once it’s uploaded, you can add recipients and create a title and message. You can also choose when the document will expire – in this example, it’s 3 months.
Other features include auto reminders and require all signers to sign before the document’s marked as completed.

After you’re all done, hit the “Quick Send” button in the upper right corner to send the document right away.
Why Scan and Email Documents?
The process of scanning documents and emailing them is faster, more secure, and cost-efficient. Businesses are adopting digital documents as the new norm to help lessen their carbon footprint, save money, and speed up business processes.
Mailing documents doesn’t ensure the recipients will get them. And waiting weeks to get signed documents back only slows down processes that would otherwise take hours to perform using email.
If this interests you, then learn more about scanning documents using your mobile or desktop device. Or better yet, start creating documents and converting them into PDF. This way, you can eliminate the use for paper altogether!
Have you ever created or signed a digital document? Let us know in the comments if and how it improved your workflow!