Zapier is a web-based service that allows users to automate repetitive tasks by combining a variety of apps. Without writing code, you can create personalised automated workflows using its connectors, called Zaps.
Zapier connects Xodo Sign (formerly eversign) with more than 1.500 apps, including Shopify, Hubspot CRM, Pipedrive, Google Sheets and Slack. How this works is that you select a trigger in an app and then an action or a sequence of actions in another app. When you activate the Zap, it will run the action(s) every time the trigger event occurs. For example, you can create a Zap that automatically sends an Xodo Sign template to a new customer to sign when you add them to Shopify. Another simple Zap can automatically update a deal in your CRM when the Xodo Sign document you've sent for signature is completed.
How It Works
The Xodo Sign integration offers two triggers, “Document sent” and “Document completed”, meaning you can create Zaps that trigger an action in another app whenever a document is sent or signed in your Xodo Sign account. For example, the Zap can automatically update your CRM or send an e-mail, an SMS or a message to your team members. Zaps in the opposite direction - from another app to Xodo Sign - can trigger the action “Use template”, which allows you to automatically send an Xodo Sign template, pre-populated with data from your CRM, for signature. For example, if you’re a recruiter, you can use such a Zap to send an automated template to a candidate to sign when they reach a certain stage of the recruitment process in the CRM.
There are two ways to create a Zap, either by using a Zap template or by creating one from scratch. Here is an example of how to create an Xodo Sign Zap from scratch:
Send Channel Messages in Slack for New Sent Xodo Sign Documents
If you want to let your team members know every time you send a document for signature in Xodo Sign, you can create a Zap that sends automated messages in their Slack channel.
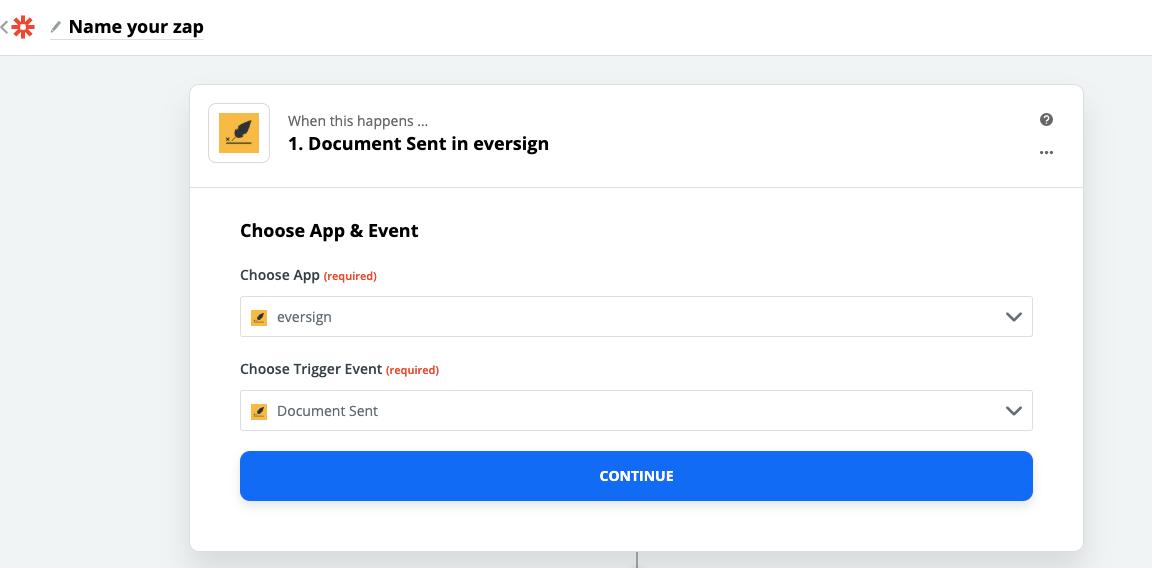
First, go to your Zapier account or sign up for one, then click on the “Make a Zap!” button. You can name your Zap by typing a name in the upper left space. In the “Choose App & Event” boxes, choose the trigger app and the trigger event, in our case Xodo Sign and “Document Sent”. You will be prompted to sign in to your Xodo Sign account and to test your trigger before continuing.
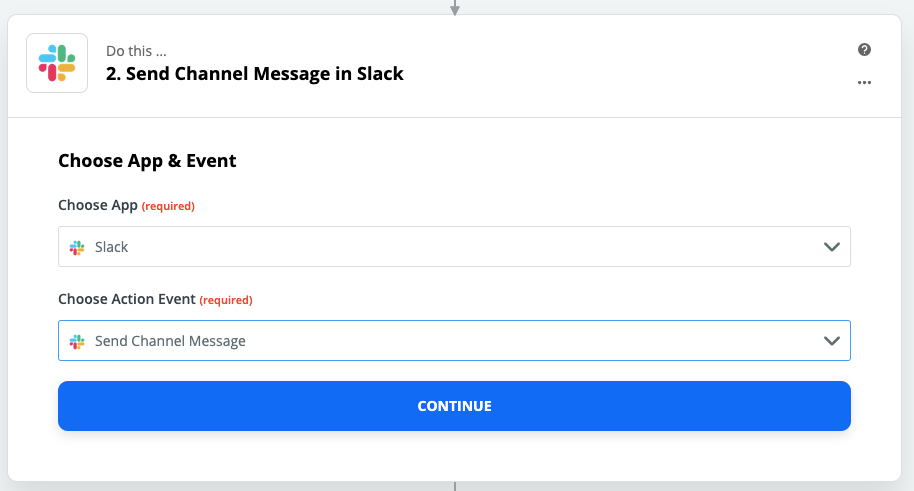
In the second step, choose the action app and the action event that will be triggered, in our case Slack and “Send channel message”, and then sign in to your Slack account through Zapier.
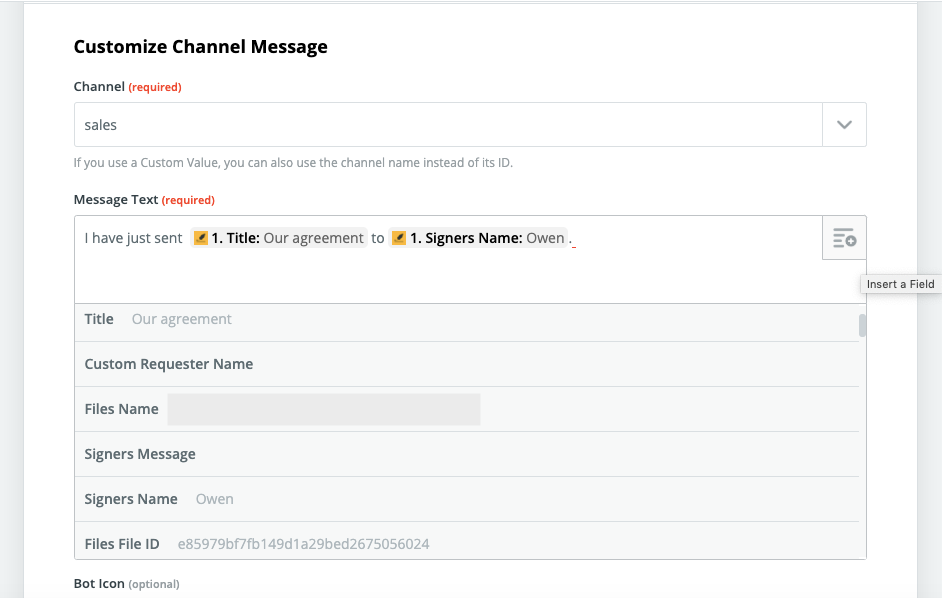
Next, choose the channel where you want to post the automated message and the data you want to send in the message. Click on the button in the upper right corner of the "Message Text" box to choose from a range of placeholders like “file name”, “title”, “signer’s name” or “signer’s ID” to insert in the message. These will be replaced with the actual data when you send the document which triggers the Slack message. You can also add plain text to the message, like in the example below.
You can further customise the action, for example add an attachment to the message, decide whether you want to post it as a bot or as yourself, or schedule it at a later date. After that, just test the Zap and you’re done! You can turn it on now and it will send a channel message in Slack each time your send a document in Xodo Sign.
You can find other Xodo Sign integrations with your favourite apps on the Zapier website or you can create your own.