Author: Angelika Cherina
Editor: Sorana Gligor
With Plumsail Documents, it takes just one click to automatically generate customized documents like contracts, invoices, sales quotes, and more.
Xodo Sign (formerly eversign) integrated into Plumsail Documents makes you have a fully automated document workflow from start to eSigned document.
Let’s see how it works!
Before we start, make sure you have:
• Plumsail account
• Xodo Sign account
Create a new process in Plumsail Documents and compose a document template
To start with, create a new process in your Plumsail account. At the very first step, you’ll be asked to provide a process name and choose the template type. Plumsail Documents supports Word, Excel, PowerPoint, HTML, and even fillable PDF templates.
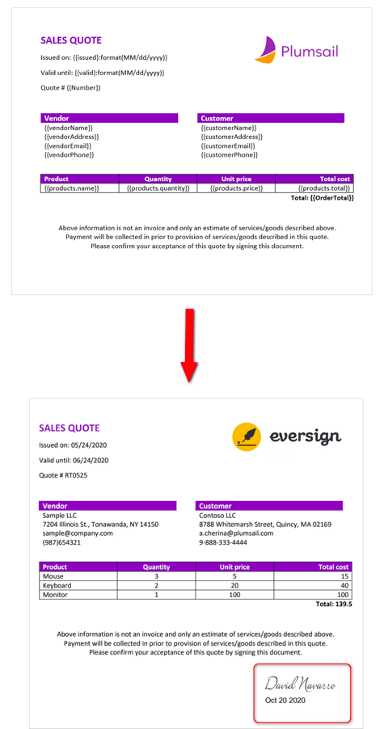
In this example, we’ll create a sales quote from a DOCX template. So, we called our process – ‘Sales quotes’, and selected DOCX for the template format.

Click the ‘Next’ button, and you’ll proceed to configure the document template. You can compose templates from scratch right in the Plumsail account. Also, it’s possible to upload pre-made document templates to the process. That's what we suggest doing in order to stick to the example provided in the article.
You can download the Plumsail sales quote template here.

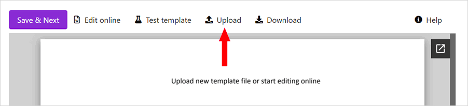
Then upload the downloaded template to the process:
Word DOCX templating syntax
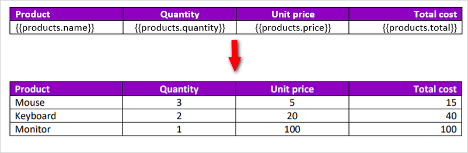
You may see tokens enclosed in curly brackets. They are variables that will dynamically turn into real values.
For instance, we used nested tags in our template - {{products.name}}, {{products.quantity}}, etc. They will pass the message to the process that we want to display properties from the ‘products’ object. The templating engine will understand that there are multiple products and will create rows for each of them automatically.
Find more information about Plumsail Word DOCX templates here.
Insert Xodo Sign signing tags into the template
To make Xodo Sign know where to place a signature and other related fields, we’ll use special hidden tags from Xodo Sign.
[sig|req|signer1] – for a signature field
[sig|req|signer1] – for a date stamp
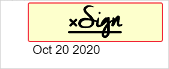
They are called hidden because it’s a common practice to change their font color to the background color of a document (usually white) to make signing tags invisible.
So, this is how they will appear for the signer:
Such tags are easy-to-build. They represent a collection of options in a specific order. Options are separated with a pipe symbol, and the whole tag is enclosed in square brackets.
For example, in the tag for a signature field, the option going first is a field type (sig), second shows the field is required (req), and third identifies the signer's number (signer1).
Learn other options in the documentation.
Connect Xodo Sign to Plumsail Documents
When you’ve finished with the template settings, go to the next step of the process configuration – Add delivery. At this step, you connect Xodo Sign with Plumsail Documents to send the sales quote to the customer for e-signing.
Add the Xodo Sign delivery, and you’ll be asked to sign in to your Xodo Sign account from the Plumsail account. Once you’re in, you’ll be able to customize the Xodo Sign e-signature delivery.
Fill in the email subject and body.
Then add recipients and select their roles. See that we used tokens from the document template to define recipients. It’s extremely convenient as you won’t need to specify a potential customer manually each time. Everything will happen automatically.
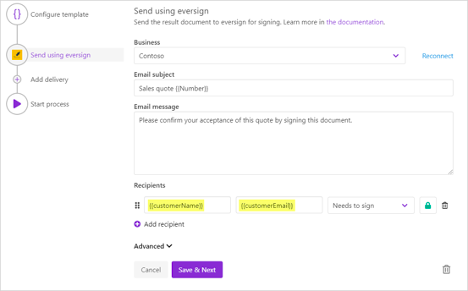
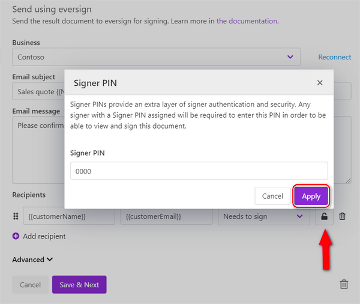
Additionally, you can provide an extra level of security and enable PINs for the signer:
Expand ‘Advanced’ to customize more settings in the Xodo Sign delivery:
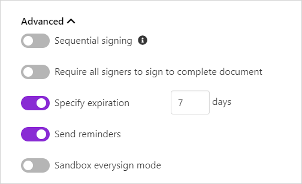
Read details in the Xodo Sign delivery documentation.
Start the process in Plumsail Documents
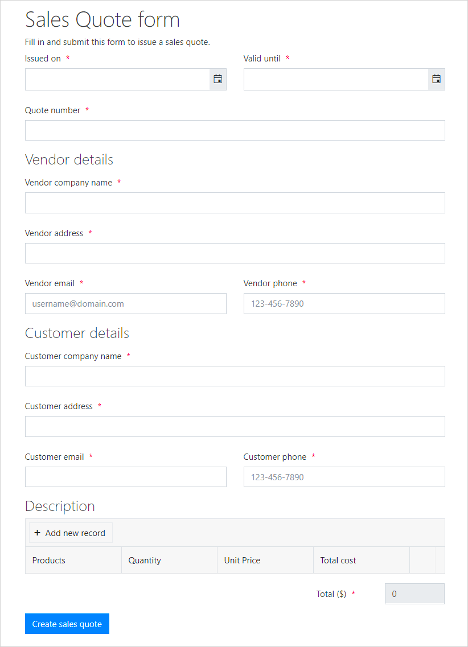
We’ll start the process from a web form. You can choose another way — manually, from Zapier, from Power Automate, or using REST API.
To launch the process, we have created such a Plumsail web form for sales quotes:
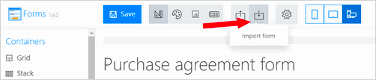
To follow the same, save this JSON file with the form to your computer. Then go to the Forms in your Plumsail account, click on ‘Create form’, import the downloaded file to the web designer:
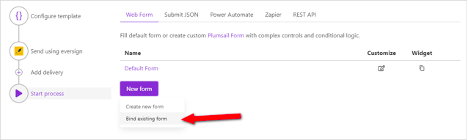
Save, and you’ve got the same web form as we have. Bind it to the process:
This bound form being submitted will trigger the process. Submission data will populate the sales quote and will send it to Xodo Sign for signing.
Getting started
In the example above, we created a sales quote from a Word template and sent the resulting document in PDF to Xodo Sign for electronic signature. Use this approach to automate any other documents such as invoices, contracts, applications, and many more.
Sign up for a 30-day free trial in Plumsail Documents to try this integration.
To create a Xodo Sign account, register here.