Creating the WebMerge Template
By using WebMerge together with eversign, you can instantly populate a large number documents like contracts, quotes, proposals, agreements, NDAs and automatically send them to eversign for legally binding e-signature.
Initially, you need to upload the template for the document to WebMerge, before it can be sent out for e-signature. To create this template, you need to create an Office Document (Word, PowerPoint, Excel) with merge fields (fields that will be populated and replaced with your data).
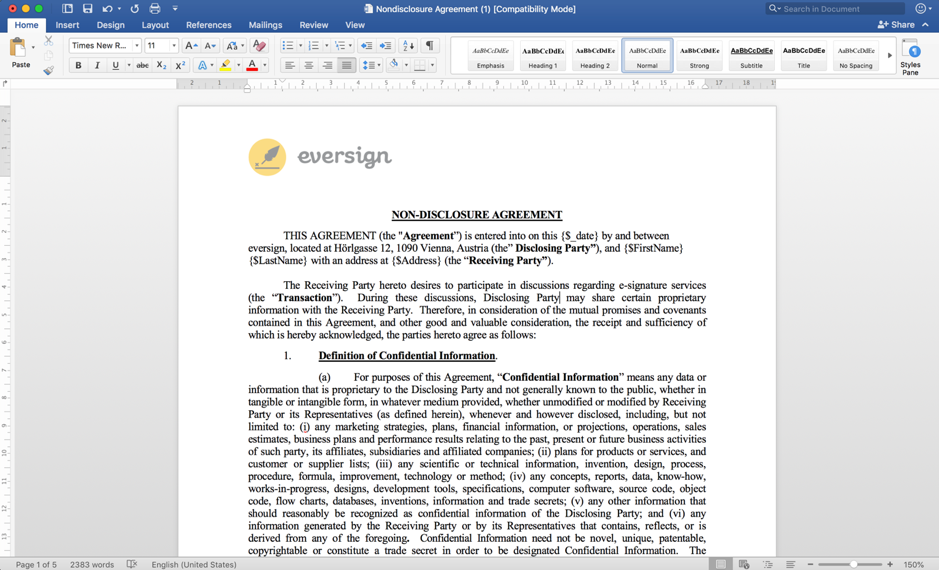
In this example, we will use a Word document to create the template. In the Word document, we will add your logo, contact information and any other information. You will also need to add the merge fields that will be populated with your customer data through either using a CSV or importing from URL. The merge fields have the following format: {$date} (Adding “” in front of “date” auto-populates this field based on today’s date), {$FirstName}, {$LastName}, and can be any data that you wish to populate the document with.
WebMerge Merge Fields:
It’s important to note that WebMerge merge fields cannot start with a number, and can’t contain any special characters.
Below is an example of what your WebMerge template should look like, so that the date, first name and last name will be:
Creating the eversign Hidden Tags
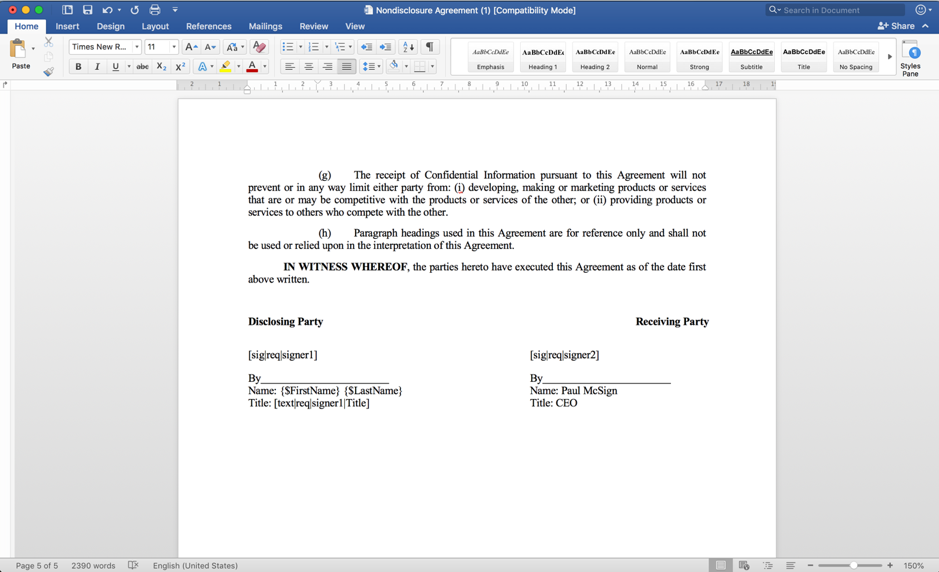
As this document needs to be sent out for e-signature using eversign, we need to insert a signature tag in the document, so that eversign knows where to place the signature field.
White-on-White:
Since hidden tags should in fact be hidden on your document, they should be added in same colour as the background of your document. In most cases, this is white-on-white.
These hidden tags are text like all other fields and looks like this: [sig|reg|signer1] or [text|req|signer1|Title] for example.
There are hidden tags for signature fields, initial fields, text fields, date signed fields and checkbox fields. You are able to read a more in-depth explanation of eversign hidden tags here: https://eversign.com/api/documentation/hidden-tags#usage
Uploading the Document Template to WebMerge
Now that the template has been completed, it needs to be uploaded to WebMerge, so that we can use a CSV to auto-populate the merge fields and then deliver the document for e-signature via eversign.
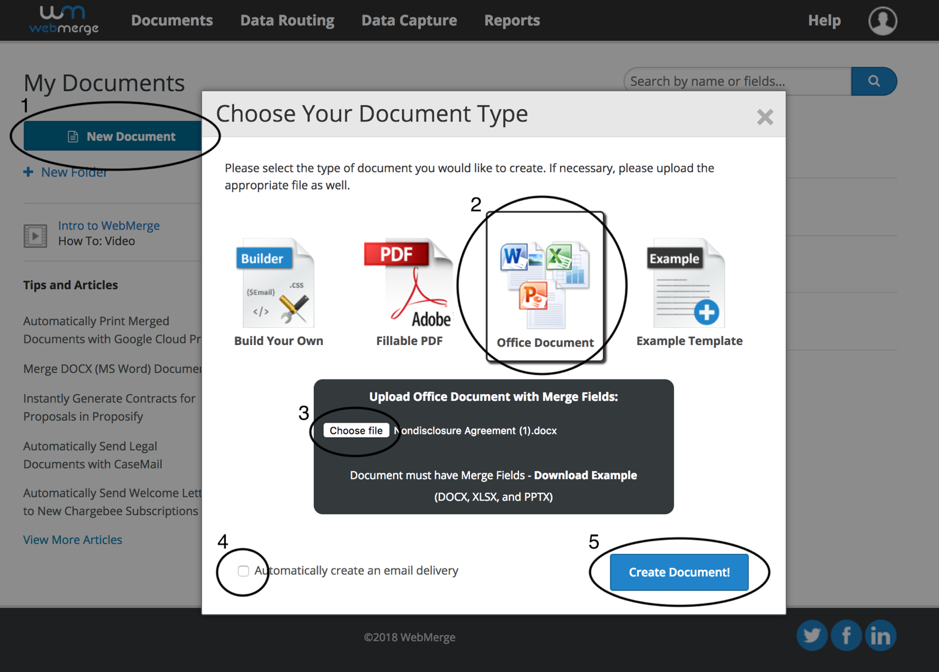
From the Documents tab in WebMerge, click the “New Document” button (1). Enter the name of your document, and then the next step is choosing the Office Document as the document type (2). Then you need to select the file you have created from your computer (3). To make setting up the eversign delivery easier, untick “Automatically create an email delivery” (4). Finally, press on “Create Document” (5).
Customising Document Settings in WebMerge
After you’ve uploaded your document template to WebMerge, you’ll be taken to the Settings tab, where you are given the option to modify various different aspects of the document such as the file type generated and the name of the file. In our example, we are going to choose PDF as the output file type (1) and include the name of the customer in the file name by using the {$FirstName} {$LastName} merge fields (2).
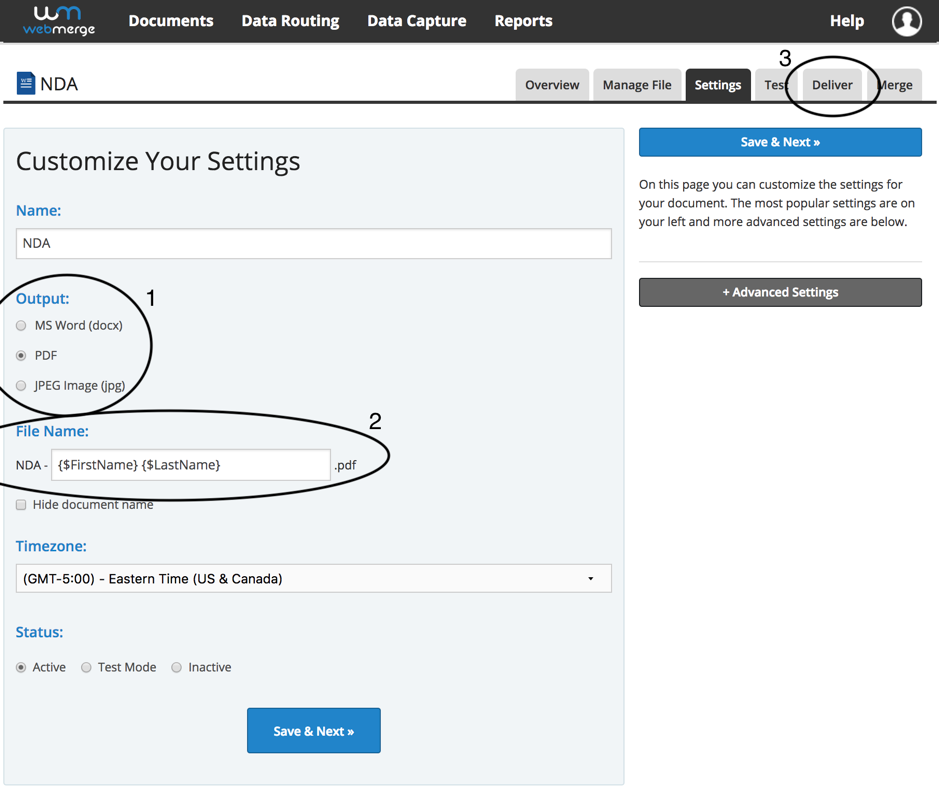
Once the settings have been customised to your liking, it’s time to set-up the eversign delivery (3), so that the document is automatically sent for e-signature via eversign.
Setting Up the eversign Delivery
Once you’ve gotten to the Deliver tab, click on the “New Delivery” and select eversign from the list. You’ll need to choose the merge fields for the signer’s name and email address. If you haven’t included the signer’s email in the document, however have it in your CSV file, then you need to select <> from the dropdown menu and enter {$Email} in the box.
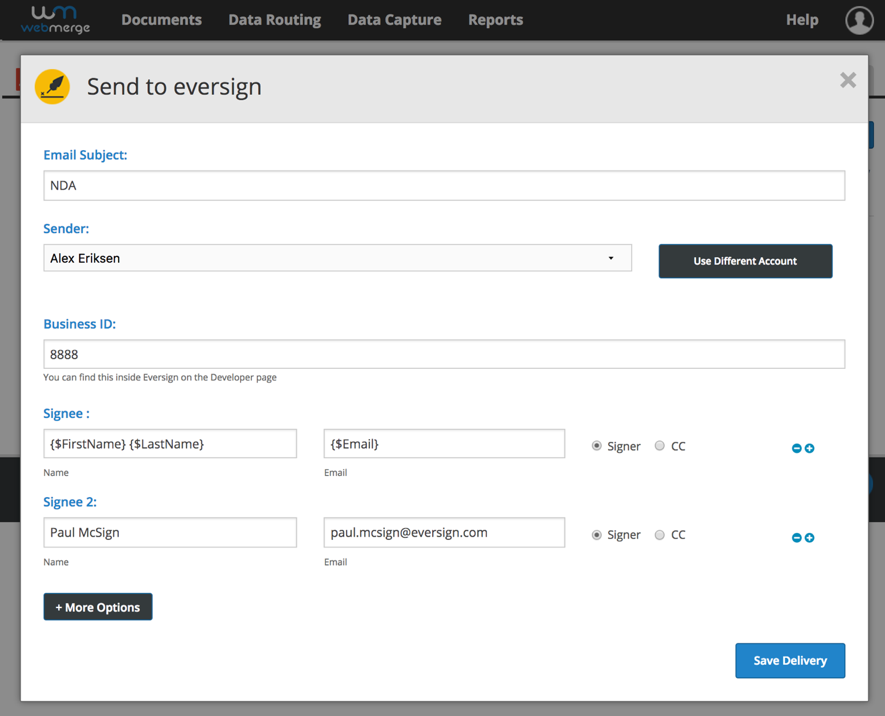
To complete authentication of your eversign account, you’ll need to add in your Business ID, which can be found inside your eversign dashboard on the “Developer” Page.

Once the eversign delivery method has been saved, the set-up process has been completed and we are ready to send out the contracts using the CSV file to populate the merge fields.
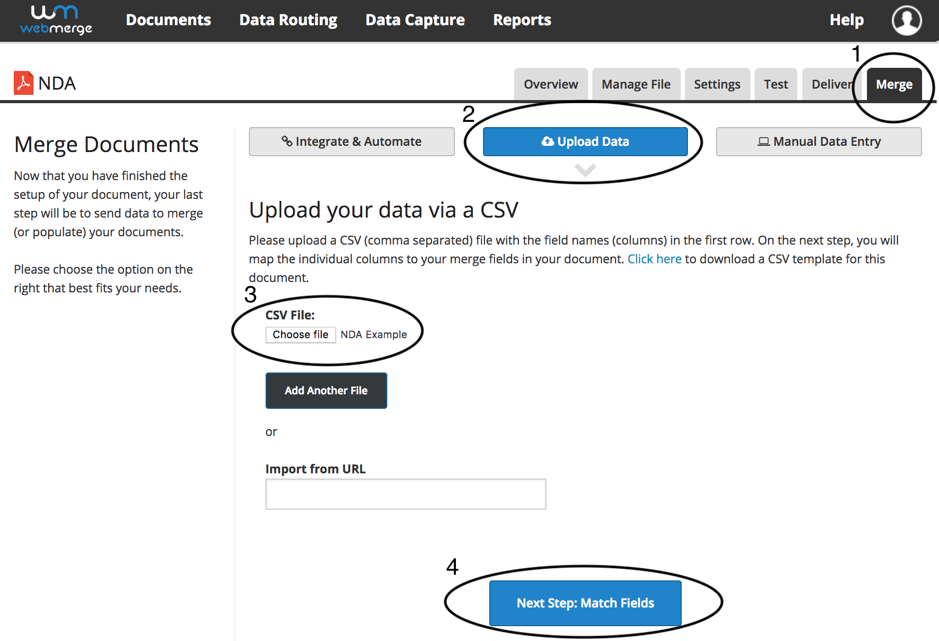
Uploading CSV to WebMerge
To upload your customer data via a CSV to get the documents sent out for signature, you need to go to the “Merge” tab (1) and press the “Upload Data” button (2). You then need to select your CSV file from your computer (3). Once it’s been uploaded you are ready to match the fields from the CSV file to the merge fields in WebMerge (4).
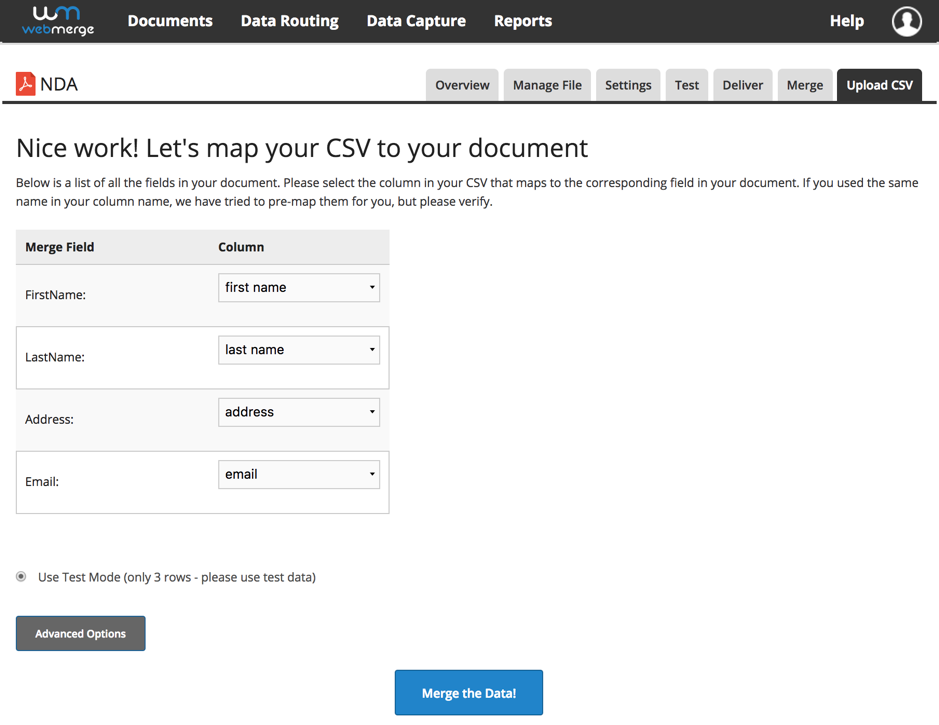
Mapping CSV Fields and Sending Out Document for E-Signature
When mapping your CSV file to the merge fields in your document, you just need to select which column aligns with each merge field. Once you’ve selected and mapped all of merge fields to your CSV, you need to press “Merge the Data!” and then your document will be sent for e-signature via eversign to all the different people in your CSV file automatically.
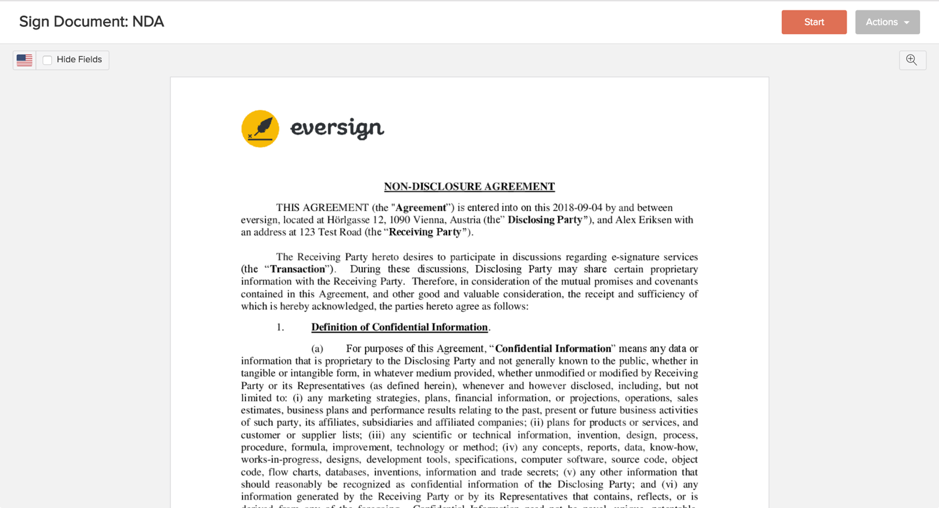
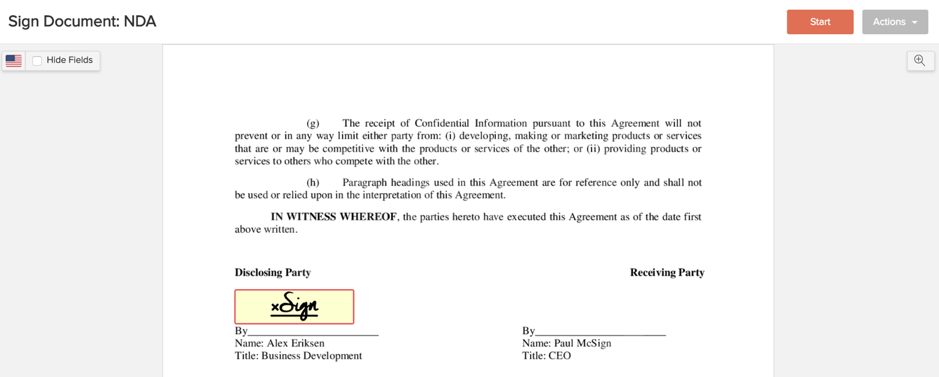
Delivery in eversign
Here’s what the document looks like ready for signature:
Hidden Tags Explained
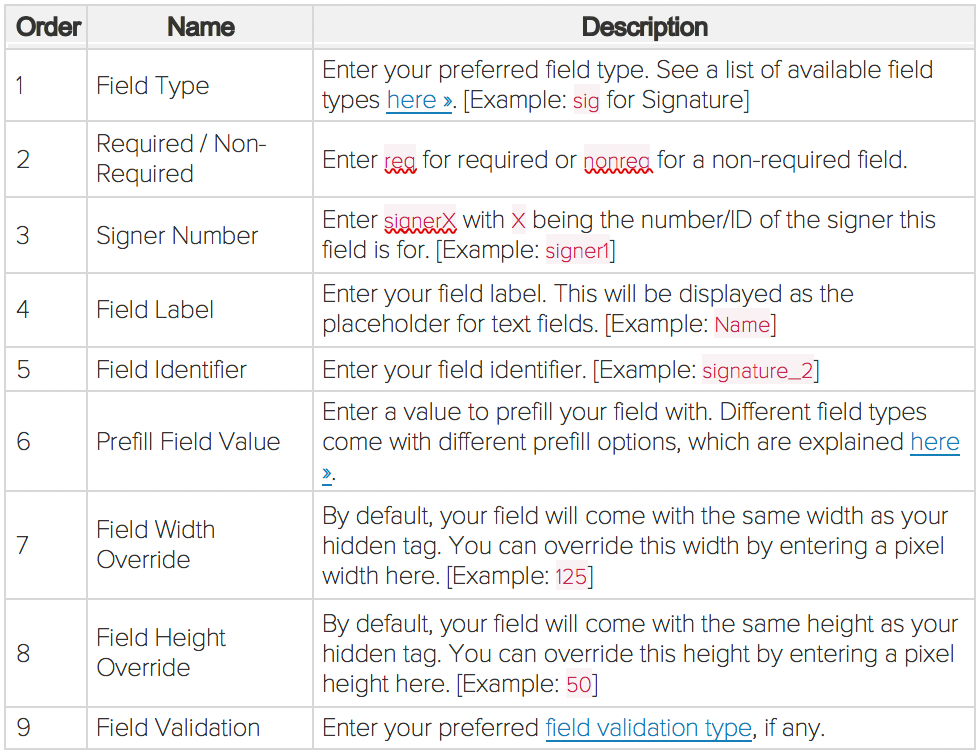
A hidden tag is a text element wrapped in square brackets [ ] containing a series of options in a specific order, all divided by | symbols. You can specify a total of 9 options, such as field type, signer ID, required/non-required, field label, field identifier, and more.
Example: Here's a hidden tag using all available options:
[text|req|signer1|Name|name_1|Paul McSign|125|50|letters_only]
In the example above, we are creating a required 125x50px text field, prefilled with the value "Paul McSign", with "letters_only" field validation enabled. Additionally, the field label is set to "Name" and the field identifier is set to "name_1".
Options: Below you will find all 9 available options explained:
Skipping Options:
In order to skip an option, simply leave it empty without making any changes to the order of other options. A field with a field identifier but without a field label would look like this: [text|req|signer1|name_1|...]